For anyone who grew up reading science fiction or watching Star Trek, the existence of planets outside our solar system was a given. We took it for granted that there must be millions of these star systems — but we didn’t have proof.
Then, in 1995, Michel Mayor and Didier Queloz at the University of Geneva announced their discovery of extrasolar planet 51 Pegasi b orbiting a G2 star about 50 light-years from Earth. This watershed event spurred a renaissance in planetary science and captured the imaginations of people all over the world.
I’ve always wanted to do science with my telescope, but only in the last 10 years has the technology been available to get serious about studying exoplanets with it. Today, just about anyone can make precise measurements of stars from their backyard. I wanted to learn asteroid imaging and astrometry — the precise measurement of minor planet positions in the sky. Then I began learning how to do photometric (brightness) measurements with tools freely available on the internet. Measuring brightness changes in starlight over time is a fundamental skill that amateur astronomers interested in doing science should learn. I’ll describe how you can do these measurements and discuss some recent technology that makes it easy to observe and record exoplanet transits with a minimum investment in equipment, time, and skills.
Discoveries
Early exoplanet discoveries were made with large telescopes using the radial-velocity method. This technique employs the Doppler shift to detect the “wobble” of stars caused by large, Jupiter-sized planets tugging on them. With this method, professional astronomers measured the shift of the absorption lines in the parent star’s spectrum.
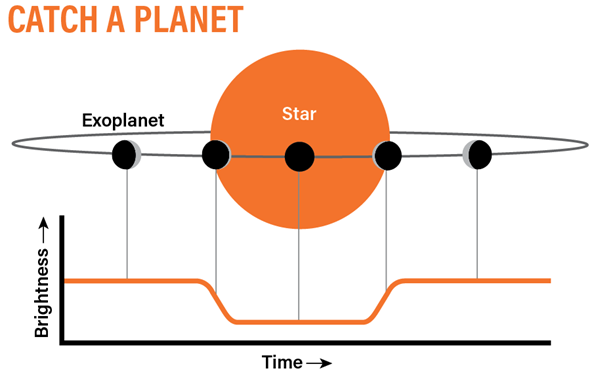
In the early 2000s, astronomers began observing exoplanets using another technique, called the transit method. With it, professional astronomers discovered several exoplanets by watching them pass in front of their parent stars (see “Catch a planet”). The transit method, virtually the same as observing a Venus transit from Earth, is the primary technique amateurs now use to detect and measure the telltale dip in a star’s brightness that indicates the presence of an exoplanet.
Photometry
Amateurs have been doing photometry of variable stars, eclipsing binaries, and asteroids for several decades using their backyard observatories. Early pioneers, such as Douglas Hall, Russ Genet, and Mark Trueblood, used personal computers and photoelectric photometers to obtain precise brightness measurements of variable stars. Since then, the standard of precision for observing these objects, which vary in brightness by up to a few magnitudes, has been 1 percent, or about 0.01 magnitude.
Standard practice is to use the differential photometry method — measuring the difference in brightness between a variable star and a comparison star to construct a light curve of the variable. A differential measurement is required to remove changes in brightness common to the comparison and target stars.
This precision is still the standard when doing photometric measurements. The fundamental difference, though, between variable stars and exoplanet transits is the amount of brightness change of these objects. For typical variable stars, that change can range from 0.5 to 3 magnitudes, a significant amount. In contrast, exoplanet transits typically cause the light to dip only 1 or 2 percent, or about 0.01 to 0.02 magnitude. As you may suspect, this measurement is difficult if the error is the same or more than the expected dip in brightness.
“High-precision photometry” refers to a total error of a measurement less than 0.5 percent (0.005 magnitude). To get this result, I first use a technique that eliminates any noise when making the measurement. After that, I need to minimize other sources of error. This is done using techniques that any amateur can learn; you may already be using some if you image.
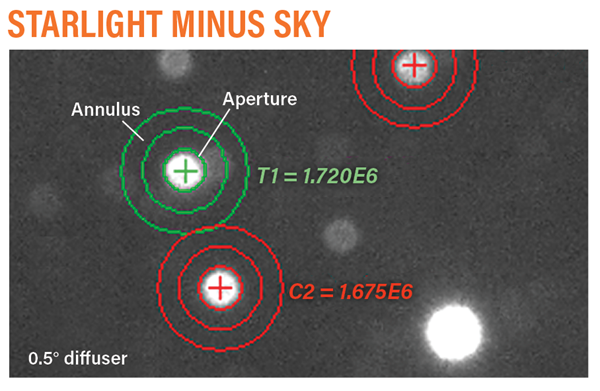
The first technique, called aperture photometry, involves performing a differential photometric measurement using an aperture to restrict the light to a given area of the detector (a CCD or CMOS chip) centered on the star. Another area, called the annulus, which surrounds the aperture, allows you to measure the sky brightness. The individual brightness of a star is measured by subtracting the sky measurement from that of the star (see “Starlight minus sky”). After these values are obtained for the target and comparison stars, the difference between them results in a series of differential photometric measurements that are used to create the light curve. This effectively cancels out any brightness changes, such as dimming by a passing thin cloud, that affect all the stars in an individual image.
Additionally, there are three types of error you must correct or minimize. One is systematic error (image defects and errors). The other two are random errors (shot noise error and scintillation error). For the systematic error, I use the standard method of calibration used by most astrophotographers when they image deep-sky objects. The RAW images are calibrated prior to doing any measurements using aperture photometry. This corrects them for bias (readout) noise, dark (thermal) noise, and differences in the detector’s pixel response. Applying these corrections takes care of most of the noise as well as image defects, such as vignetting and dust, within the camera and optical train.
Nevertheless, even after calibration, a small source of systematic error remains. This is called residual calibration error (RCE), which involves small variations from pixel to pixel. You can eliminate RCE by keeping the star on the same pixels over several hours. Although it typically totals less than a half percent, it is a significant portion of the error when you want to reveal exoplanets. RCE can be reduced through a high level of control when tracking a target accurately for long periods. Unfortunately, this can be expensive and time-consuming for most amateurs.
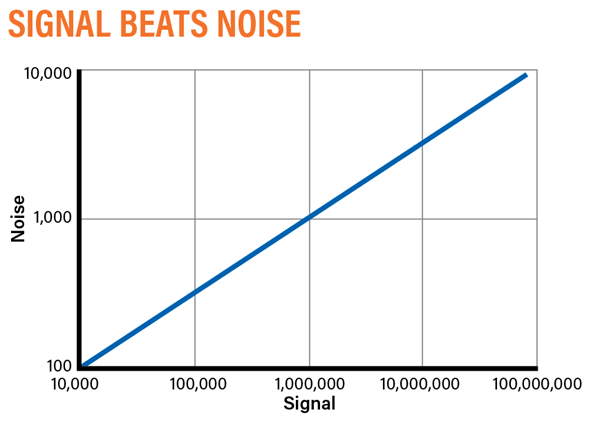
There are also several random errors. When sampling light, the photons arrive at random intervals, causing an error in the signal called Poisson (shot) noise. Shot noise is related to the particle nature of light. When doing photometry, we are counting the number of photons that hit each pixel. The detector converts the photons to a numeric value. Quantum efficiency of cameras vary, but it can exceed 75 percent of all the photons hitting the chip. The shot noise error value is proportional to the square root of the total count recorded. As the number of photons collected increases, so does the signal-to-noise ratio, which increases the shot noise accuracy (see “Signal beats noise”). The overall measurement, then, is limited only by the scintillation error.
Scintillation is an error that divides into short-term or long-term. Short-term scintillation noise is caused by atmospheric conditions that make stars appear to twinkle, and is an indication of the seeing (atmospheric steadiness). Until recently, the only way to significantly reduce short-term scintillation error was to avoid times and/or locations where it was high. Long-term scintillation noise is a slow change in the star’s brightness caused by the slow movement of high clouds and variations over time in the sky’s brightness and haze (transparency). It can be largely avoided by taking observations on clear nights.
A new method for high-precision photometry
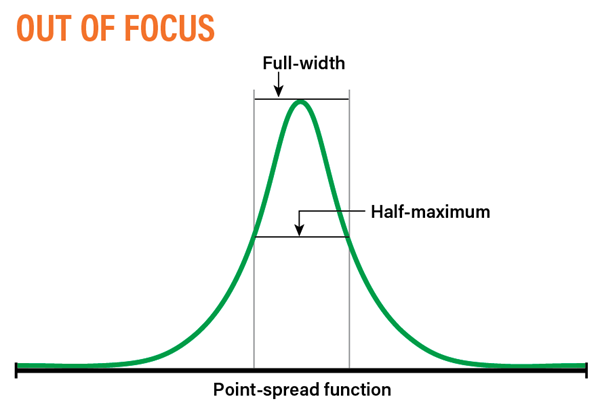
A long-used technique for doing high-precision photometry is called the defocus method. Defocusing the telescope increases the shot noise precision of the measurement by spreading the light out and collecting more photons over more pixels for a longer time without overexposing the image. When the data are represented in a graph, they appear as a point-spread function (PSF) that is bell-shaped (see “Out of focus”).
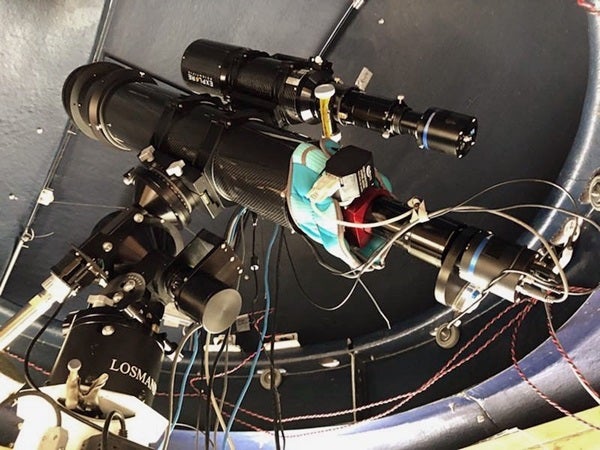
My team and I have also studied, at the Mark Slade Remote Observatory (MSRO) in Wilderness, Virginia, a new technique that I discovered in April 2018. This technique, called the diffuser method, is based on a technique first studied by astronomers at Penn State in a paper published in October 2017 entitled “Towards Space-Like Photometric Precision from the Ground with Beam-Shaping Diffusers.”
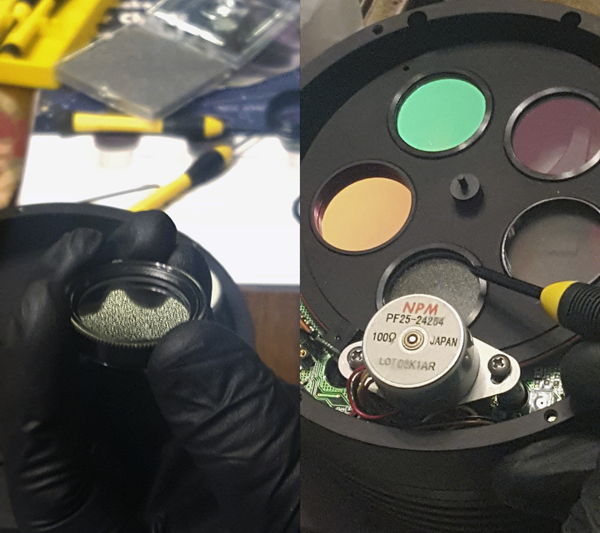
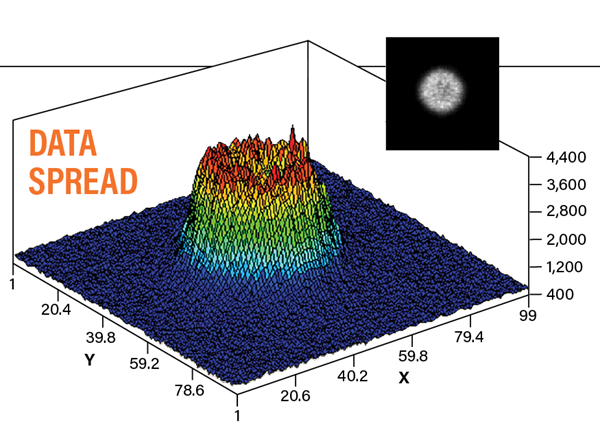
The diffuser method uses an instrument called an Engineered Diffuser, produced by RPC Photonics Inc., from Rochester, New York. The diffuser spreads the light out over more pixels, like the defocus method. Placed in the image train like a filter, it serves as an optical beam-shaping element that creates a “top-hat”-shaped PSF (see “Data spread”).
Diffuser results
With the traditional defocus method, even though the light is spread out to increase precision, its bell-shaped PSF does nothing to mitigate the effects of scintillation or reduce the need for precise tracking to eliminate RCE. At the MSRO, I used a 0.5° divergence diffuser and analyzed the data with AstroImageJ, a freely available light-curve analysis tool.
I found that using the diffuser resulted in a very stable PSF. It also significantly reduced the short-term scintillation.
I also found that, even with a significant amount of drift in the image over several hours, RCE was virtually eliminated. This is because the light is spread out among many pixels and the RCE is “averaged out.”
The benefits of using the diffuser method are shown in a paper describing our work, published recently in the Proceedings of the Society for Astronomical Sciences 2019 Symposium, entitled “A Comparison of the Diffuser Method Versus the Defocus Method for Performing High-Precision Photometry with Small Telescope Systems,” Hubbell et al.
The diffuser method typically reduces the shot noise to less than 0.001 magnitude. For three-minute exposures, the short-term scintillation error could be reduced to less than 0.002 magnitude for a magnitude 10.8 star.
The results for one exoplanet I imaged, HAT-P-16 b, proved to be of high quality. The long-term scintillation performance was the same as the defocus method, but the diffuser method provided high-precision results even with significant amounts of haze and the Moon high in the sky. The defocus method did not reduce the short-term scintillation in these same conditions.
By using the diffuser method, you’ll have more opportunities to observe exoplanet transits and make high-precision measurements with your equipment. All you need to add is a diffuser. This inexpensive method will help you contribute to science by making follow-up observations of exoplanets discovered by NASA’s TESS mission or archived Kepler data.