Perhaps nothing has revolutionized amateur astronomy more than go-to telescopes with motorized drives that find and track any of thousands of deep-sky objects. No longer must users rely on a celestial map to star-hop to the wonders of the sky. Some models, however, have proven a bit too complicated for beginners — and, as the scopes’ sizes increase to access ever-fainter objects, they’ve proven a bit too expensive as well.
But the engineers at Celestron have hit upon a novel approach: The company’s recent StarSense Explorer line drops the motorized drive and puts the software and the database into our smartphones.
Meet the StarSense Explorers
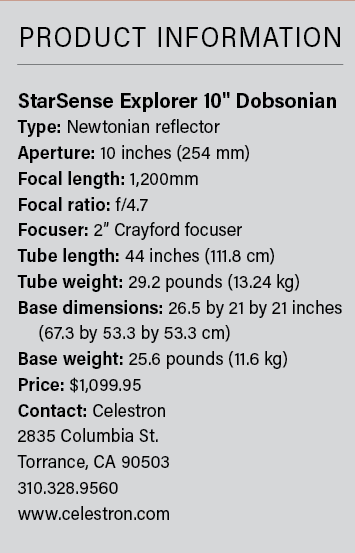
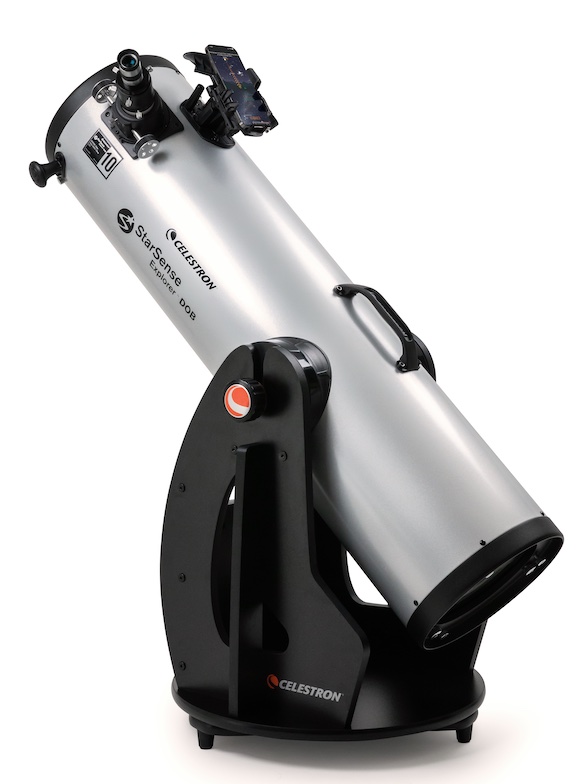
Celestron has several models in its line of StarSense Explorer telescopes, first introduced May 2021. They include 3.1-inch and 4-inch refractors, 4.5-inch and 5.1-inch reflectors, and a 5-inch Schmidt-Cassegrain. The company also has just introduced 8-inch and 10-inch Dobsonian models.
The technology differs from Celestron’s StarSense AutoAlign add-on accessory. Once you attach an AutoAlign unit to a Celestron go-to scope, it uses a digital camera to take a series of images of the night sky. The built-in database then plate solves the images for recognizable star patterns and calculates where the telescope is pointed.
Instead, the StarSense Explorer models are “push-to” models. After selecting a target with the free Celestron StarSense app, the observer follows the arrows on the phone’s screen, manually moving the telescope until the bull’s-eye turns green. The target is then ready to view in the eyepiece. The StarSense Explorer telescopes substitute a motorized go-to mount for your smartphone’s GPS and camera, which is precisely aimed at a tilted mirror, to plate solve. At first glance, that may seem like a step backward — after all, you have to manually adjust the telescope. But it actually serves two purposes: making the cosmos accessible and teaching beginners how to find objects in the night sky.
The free StarSense app is compatible with iOS and Android devices. It works with the iPhone 6 and newer and on Android phones manufactured in 2016 or later, as long as they run at least Android 7.1.2. The phone must have a built-in camera, gyroscope, and accelerometer.
It’s here
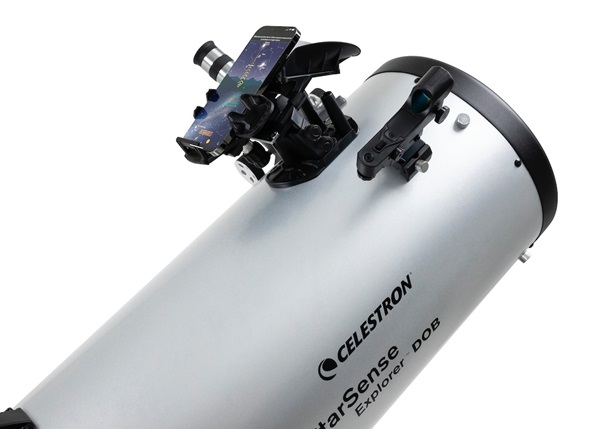
The scope arrived securely packaged in two boxes. Inside one was the optical tube assembly. The other contained the flat parts of the Dobsonian mount and lots of Allen head bolts to connect everything together. The package also contained a box of accessories that included the smartphone dock, a red-dot finder so you could point to an object by eye, an eyepiece rack, the base handle, and an instruction manual. I received a 25mm Omni Plössl eyepiece, a 2″ focuser extension tube, and a 2″-to-1¼” eyepiece adapter.
One nice feature Celestron included was a 2-inch (5.1 centimeters) knob that sits 2 inches (5.1 cm) high, pre-attached to the tube. Grabbing this made moving the scope around easier than using the front end of the tube.
The adjustable dock held my reasonably large Android phone and case securely no matter where I pointed the telescope. Once your phone is locked in, you need to center it to the dock’s tilted mirror. (The tilt is set at the factory.) The StarSense app has easy-to-follow instructions on how to do this, but basically, you just turn the dock’s two adjustment screws until your camera is unobstructed.
The fine alignment begins when you point your telescope at an earthly object at least 100 yards (100 meters) away. It could be the top of a utility pole, a street sign, the top of a tree, etc. Center the object first in the red-dot finder, then in the scope’s eyepiece. Zoom in your phone’s view and slide it around with your finger until the same object is centered on the crosshairs. You may also need to use the dock’s adjustment screws until you center the target.
The app recommends practicing this during the day so you’re prepared to do it at night. I recommend aligning the scope around the middle of evening twilight. Alternatively, the next best option is to center your scope and phone on one of the cusps (points) of the crescent Moon.
Time to observe
The app uses a “planetarium” view to display the sky, complete with star and constellation names, lines showing each constellation’s outline, planets, and select deep-sky objects. When you’re ready to observe something, just tap it. If you’re not sure what to look at, hit the Star icon for a list of “best objects.” Pick one! A box with its name will appear at the bottom. Select it, and you’ll see information about the object.
On the screen you’ll see arrows and a bull’s-eye. The former tell you which direction to move the scope, while the latter shows where the scope is pointing. If you’re not anywhere close to the object, the bull’s-eye will be red. As you adjust the scope, stop every few seconds so the app can recognize some stars; once you’re close enough, the bull’s-eye will turn yellow. Finally, when you’re on target, it will turn green.
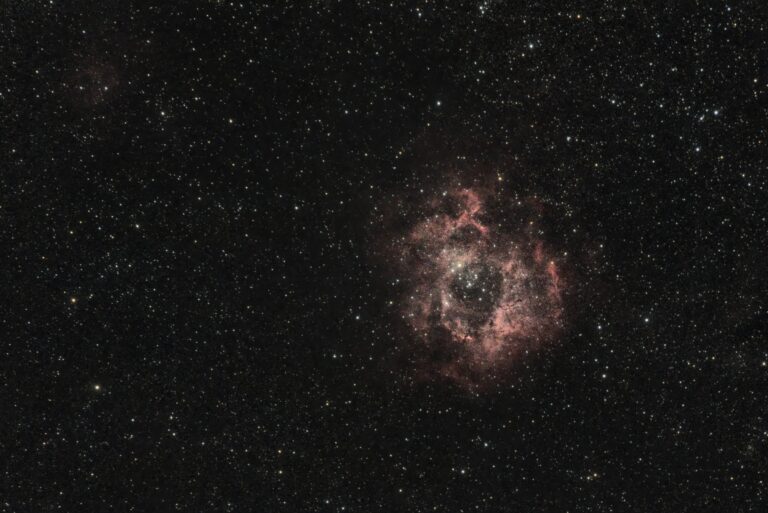
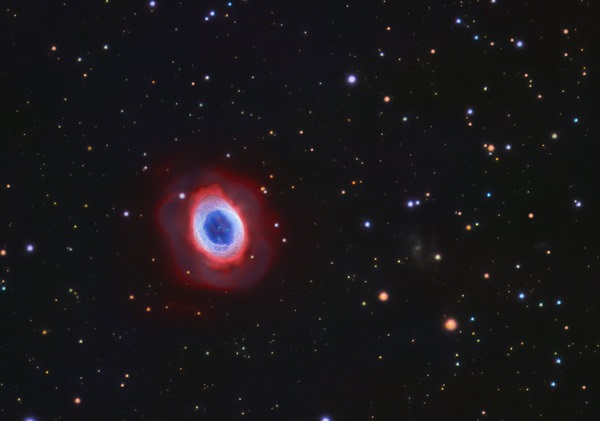
Because I was testing a 10-inch scope under a dark sky, I headed for the deep sky. My first selection was the Ring Nebula (M57) in Lyra. Here’s where amateurs usually cross their fingers and hope they’re centered — it’s a big sky and it can be incredibly easy to get lost when you start out. But my first thought was, “Celestron’s got this.” And, indeed, when I looked through the eyepiece, there was the evanescent doughnut of the famous Ring.
I didn’t have to venture far to target M57, so next I wanted to seek out an object that required more of a telescopic trek. I selected the Sombrero Galaxy (M104) in Virgo, nearly 100° from the Ring. Grabbing the handle, I slowly moved the scope southwest. When the bull’s-eye turned green, I looked in the eyepiece, and there it was.
I spent the night finding and viewing another 15 or so objects — all of which fell at or near the center of the eyepiece’s field of view — and I had a blast. The app was easy to use and, aside from a few gentle nudges while observing — especially with higher-power eyepieces (remember this system does not track) — everything was very straightforward. Overall, I’d say nothing I did was complicated enough to intimidate a novice observer.
And that’s not even mentioning the telescope itself. After all, Celestron’s 10-inch Dobsonian is the heart of this setup. Unsurprisingly, it provided great views! Celestron is a well-known brand for a reason, and the StarSense Explorer more than lived up to their reputation.
My verdict: The StarSense Explorer 10″ Dobsonian is a hit. Its two-piece construction makes it easy to set up or transport, it features a worthy aperture with high-quality optics, and the push-to system is easy to understand, align, and use.
Whether you buy the 10-inch or a smaller model, you can expect a great experience under the starry sky.