I’ve been observing for many years, yet I still look at Jupiter and the Moon as often as I ever did. The Moon has so many features and details that if you observed it each possible night for the next decade, you wouldn’t see everything. There’s an added benefit to looking at brighter objects when you’re first starting out — they’re easier to find.
Many observing guidebooks exist to help you tour the sky’s best celestial objects. In addition, each month, Astronomy magazine presents a section entitled “The sky this month.” Individual features about that month’s astronomy highlights (such as eclipses), the planets, deep-sky observing, meteor showers, comets, and asteroids will provide you with plenty of ideas about what to observe. Ongoing (but not monthly) features such as “Moon observer’s notebook” and “A deep-sky year” provide additional projects that go into a bit more depth for beginning observers.
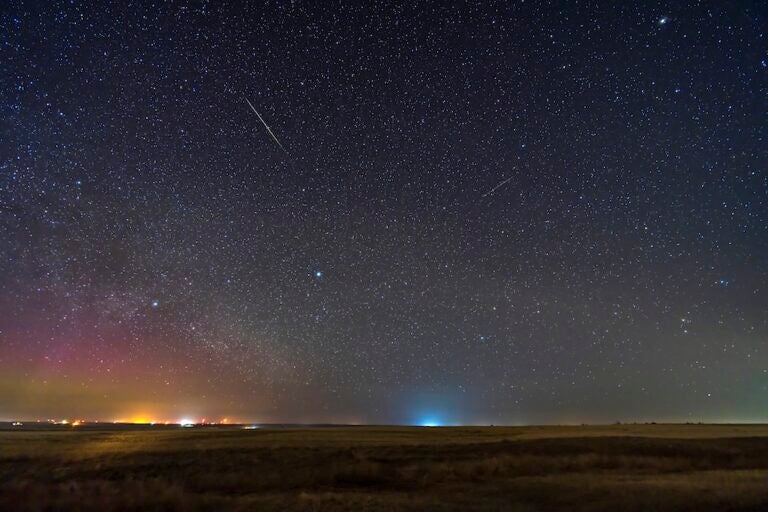
One of the most pleasurable observing experiences you can have under the summer or winter sky is simply scanning the Milky Way with your telescope. It’s so simple — just shut down your laptop, ignore your observing guides, and turn off your go-to drive.
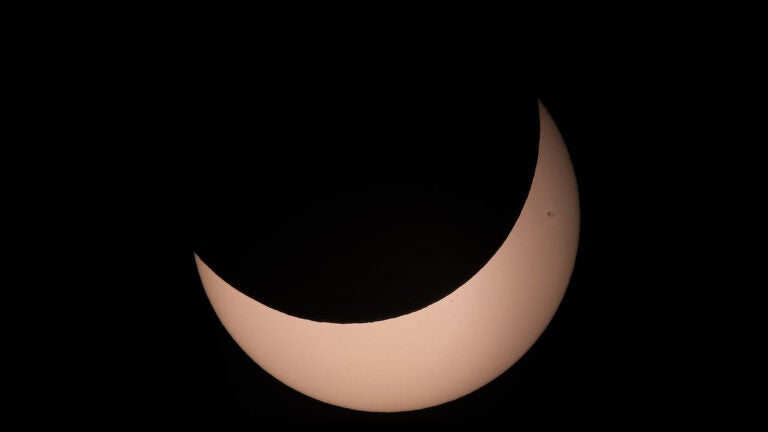
You can double your potential observing time if you purchase a quality solar filter and observe the Sun. You must be very careful when observing the Sun. Never look directly at the Sun with the naked eye or with any unfiltered optical instrument, and always cover your finder when observing the Sun. That being said, there are a number of safe ways to observe the Sun.
A filter that fits over the objective of the telescope is called a pre-filter. If you use a “pre-filter,” be absolutely certain it cannot be dislodged accidentally by the wind or by being bumped. If you are in doubt, securely tape the side flange of the filter to the telescope tube. When I construct a mounting cell for a solar pre-filter, I always include a large thumb screw that secures the cell to the tube.
Start your solar observing by counting sunspots. Apart from being fun, sunspot counts provide a gauge of solar activity. Numbers of sunspots have been recorded on a daily basis since the middle of the 18th century. Sunspot observations can be quite different day to day because of different atmospheric conditions.
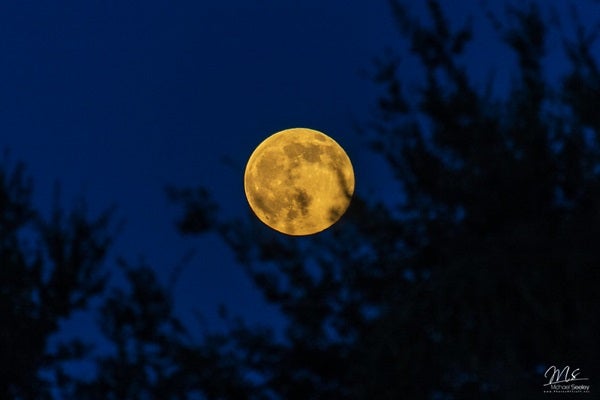
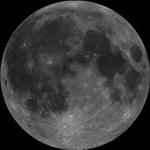
The Moon is a brilliant object when viewed through a telescope. You actually may want to use a neutral density filter to reduce the Moon’s light. A better method is to do what many observers do to help them observe the Moon in comfort: Turn on nearby white lights when you’re observing the Moon between First Quarter and Full. The addition of white lights suppresses the eyes’ tendency to dark adapt at night and, in fact, causes the eye to use normal (scotopic) vision, which is of much higher quality than dark-adapted (photopic) vision.
Of the 1,940 named features on the Moon, 1,545 (nearly 80 percent) are craters. There are many more craters in the highlands than in the maria. The size range of craters is large, and some observers make it a personal challenge to see either (1) how small a crater they can see, or (2) how many small craters in a given area they can observe with a particular telescope. A detailed map of the Moon is, of course, a necessity for a project of this type.
When observing larger craters, note whether you can see “rays” emanating from them. These features were formed when crushed rock sprayed out from a meteor impact. They form streaks in a radial pattern, which can be a great distance from the crater itself.
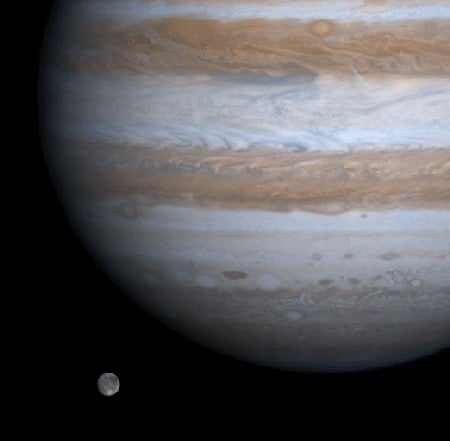
Next to the Sun and Moon, the celestial object with the greatest detail is Jupiter. Even small telescopes will show Jupiter’s four largest satellites. They appear as bright stars on either side of Jupiter and are generally in a straight line (although some interesting triangles and other forms are possible).
In addition to the moons, several dark stripes can easily be seen on the planet. These stripes, on either side of the equator, are known as the North and South Equatorial Belts. With larger telescopes operating at greater magnifications, more belts are visible.
At higher magnification, you can see that Jupiter is flattened, a result of its rapid rotation rate coupled with the fact that it is not a solid planet. Jupiter’s equatorial diameter is more than 5,000 miles (8,050 kilometers) larger than its polar diameter.
Watching Jupiter night after night can be a rewarding pursuit. In addition to the changing positions of its moons, the planet’s rapid rotation brings nearly all of its visible area into view in a single night. At times, individual belts and zones become more or less prominent. Some have even disappeared for extended periods of time.
All observers should use filters to bring out fainter detail not visualized in integrated (white) light. A blue (e.g., Wratten 38A) filter will enhance the dark reddish-brown belts over the planet. A red (e.g., Wratten 23A) filter will bring out the blue features (festoons) within the Equatorial Zone (EZ) of Jupiter as well as the northern and southern borders of the major belts.
Jupiter is a great object to sketch. Sketching will make you a better observer because you’ll study small areas more intently. Two words of caution when sketching Jupiter: Draw quickly! Jupiter rotates quite rapidly, and some of the features you’ll be sketching may rotate out of view if you take longer than about 20 minutes. Sketch the positions of the equatorial belts and polar regions first. Carefully estimate their widths and extent and where, in terms of latitude, they begin and end. Next, place the less apparent belts and zones on your sketch as they appear on the planet. Work on one hemisphere at a time. Next, place features within the belts and zones using Jupiter’s central meridian (an imaginary line from top to bottom) to help you gauge the distances. Finally, carefully shade your sketch to duplicate what you see. One technique some observers say works to bring out additional detail on Jupiter is to focus the eye on a spot halfway between one of the poles and the equator — but don’t actually look at the spot. Concentrate on seeing and sketching detail in the polar area. Repeat for the other hemisphere.
Astronomers estimate that 60 percent of all the stars in the Milky Way Galaxy are double or multiple stars. These stars appear as one to the unaided eye, but many may be resolved into pairs with the help of a telescope. I don’t think there’s an amateur astronomer I know who doesn’t enjoy observing double stars. It’s fun, easy, rewarding, doesn’t take a complicated setup, you can observe from within a city, and challenging objects exist for every size of telescope.
In addition to where the double star is in the sky and how bright each component is, there are two quantities with which a double star observer should be familiar. The first is the “separation” of the pair. This number is given in arcseconds, and it is simply the distance between the two stars. The second quantity is the “position angle.” This is the angle, measured from north through east, of the fainter of the pair (the “companion,” or “secondary”) from the brighter (the “primary”). For instance, if the companion is due north of the primary, its position angle is 0°. If it is due east, 90°, and if midway between south and west, 225°.
To determine the directions in your field of view, just let the stars drift for a while. If your telescope has a motor drive, turn it off for this check. The stars will enter the field of view from the east and exit to the west. Determine the longest path for the stars you see drifting through the field. This is your east-west line. The north-south line is perpendicular to it, and to find it, turn the drive back on, center a reasonably bright star, release the declination lock on your drive, and move the telescope by hand toward the north. As you observe the field of view, the bright star will be heading out, toward the south. Reverse this if you are located in the Southern Hemisphere. The technique is only slightly more complicated if you own a telescope on an alt-azimuth mount. To move this type of telescope “north,” you have to adjust the altitude and azimuth motions simultaneously.
The size of your telescope will influence which double stars you observe. The resolution of a telescope only depends on its size. Double star observers often refer to a rule of thumb called Dawes Limit. The formula for Dawes Limit is r=4.56/D, where r is the separation (in arcseconds) of the closest resolvable double star, and D is the diameter of the objective in inches. Alternately, you can use r=114/D, where D is the diameter of the objective in millimeters. And remember, Dawes Limit is only a guideline.
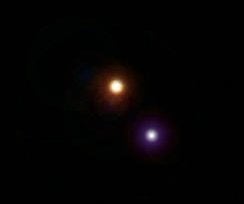
One reason for the popularity of double stars is that many of them show color. Colorful double stars are a joy to behold. It does take some time at the telescope before you begin to see colors easily, but the payoff is big. Close double stars often help us see color. The contrast between two or more stars in close proximity brings out subtle color tones that normally would be lost if each was viewed separately.
Some of the enjoyment in amateur astronomy is in sharing observations with friends. You will find, however, that color perception at the eyepiece is about as personal and subjective as any phase of our hobby. Colors that you see apply to your eyes, period. Consider the following example. Once, at an observing session, my friend Steve Coe of the Saguaro Astronomy Club of Phoenix, Arizona, mentioned that he saw the double star 107 Aqr as white and light green. His friend Gerry Rattley immediately stepped to the eyepiece and, after a moment, asked, “Which star are you calling green, the orange one?”
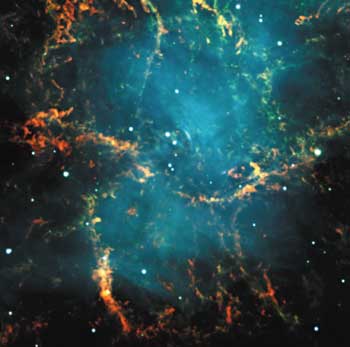
Charles Messier (1730 – 1817) was a French comet hunter. In his searches, he occasionally encountered celestial objects that had the appearance of comets. These objects appeared fuzzy in his small telescope but did not move against the background of stars. The astronomers of the day called these objects “nebulae, ” a word whose definition is much more specific today.
During his searches, he discovered a comet-like patch in Taurus on August 28, 1758. This non-moving object later became the first entry — M1 — in his famous catalog of nebulous objects that might be mistaken for comets. Messier published three versions of this catalog. The final tally of objects amounts to 110 and is the catalog we recognize today. For more about Messier and the objects in his catalog, I suggest reading Messier’s Nebulae & Star Clusters by Kenneth Glyn Jones (Cambridge University Press, New York, second edition, 1991).
Working your way through Messier’s list will introduce you to some of the brightest deep-sky objects in the sky. You’ll also learn about several types of deep-sky objects: star clusters, nebulae, and galaxies.
If you’ve seen all, most, or even just a few of the Messier objects, it may be time for you to participate in a Messier marathon — trying to see as many Messier objects as you can in a single night. I remember participating in Messier marathons in the early 1970s. In 1974, from the reasonably well-lit campus of the Ohio State University in Columbus, Ohio, a friend and I logged 106 Messier objects in one night using his 6-inch Newtonian reflector. Since then, I’ve seen all 110 in one night more than a dozen times.
But the number of nights on which you can see all the Messier objects is limited due to the way the objects are distributed around the sky. Tom Polakis, an Arizona amateur astronomer and Astronomy contributing editor, has calculated the window of opportunity for a complete Messier marathon. Polakis’ numbers are for 33° north latitude, and they get more favorable as you work your way south. The beginning of the season is about March 17. The Messier marathon season ends on April 3. Remember, however, that you can’t just go out and observe the Messier objects on all those dates. The second limiting factor is the Moon. Its phase must be within a day or so of New Moon.
Can you see them all in one night? The quick answer is “yes.” Many people have viewed all the Messier objects during a single night. All the Messier objects can be seen from a dark site on a good night with a good 3-inch telescope. I even have done the marathon with high-quality 7×50 binoculars. On March 4/5, 2000, under a partly cloudy sky, I saw 75 Messier objects, and I believe 90 is a strong possibility with good weather.
- Video: How to use a star chart — Senior Editor Rich Talcott helps you navigate the night sky using Astronomy magazine’s pullout star chart, located in the center of each monthly issue.
- StarDome — Astronomy.com’s interactive star chart lets you construct an accurate map of your sky and find your favorite constellations, planets, galaxies, and more. [Related video: How to use Astronomy.com’s interactive star chart StarDome]
- ABCs of observing — Sharpen your scope skills with these 26 tips
- Constellation observing — Downloadable articles that highlight all 88 constellations in the sky and explain how to observe each constellation’s deep-sky targets.
- Weekly observing podcast highlights three objects you can see in the night sky