CCD stands for “charge-coupled device,” a rectangular, solid-state, electronic chip made primarily of silicon. During the making of the chip, it is divided into many small arrays of light-sensitive cells, each of which forms one small part of the entire picture. These picture elements are called “pixels.”
Each pixel works because of the photoelectric effect. This effect occurs in specific materials, causing them to release electrons when struck by light. The electrons released by the pixel accumulate as light continues to strike the pixel during the exposure time. Once the exposure is complete, the pixels of the CCD are dumped, or unloaded, to a computer with software ready to turn the data into a picture (for viewing or storing as a file) or into a raw count (for a branch of astronomy called photometry, which measures the light output of celestial objects).
CCD cameras used by amateur astronomers are able to produce color images, although not directly. To obtain a color image, three monochrome images of a celestial object must be taken through a red, green, and blue filter. This process allows the CCD chip as a whole to mimic the action of a color chip. Once the three images are obtained, they are combined by a computer with the appropriate software.
Many cameras other than astronomical CCDs now use CCD chips. Video camcorders and digital cameras are good examples. Most camcorders have CCDs with arrays of a few hundred pixels on a side. The best digital cameras may have chips with a thousand or so on a side. Most are in a rectangular format, such as 640×480, etc. Recently, digital camera manufacturers have started advertising “megapixel” cameras. For example, a 6-megapixel camera contains a CCD chip measuring 3,000 pixels by 2,000 pixels. The higher the pixel count, the greater the resolution.
Two types of chips form the heart of the CCD camera: “frontside illuminated” and “backside illuminated.” These chips sometimes are referred to as “thick” and “thin” chips, respectively. Light striking the pixels of frontside illuminated (thick) chips must pass through a number of layers of the CCD first. Not so with backside illuminated chips. With these, the chip has been “thinned” so light strikes the pixels directly. Backside illuminated chips are usually more sensitive to light of all wavelengths, especially blue light. The lack of response to blue light was a serious problem with early CCD chips.
The measure of the sensitivity to light of a CCD chip is called its quantum efficiency (QE). Unfortunately, every photon of light falling onto a CCD will not be registered. QE, therefore, is the percentage of light that actually is recorded by the chip. Thin chips generally have a higher QE than thick chips. High-quality thin chips are more than 95 percent efficient.
Because CCD chips are electronic in nature, they generate heat. Unfortunately, heat (as well as light) will cause the pixels to generate electrons. Most CCDs are cooled in ways that vary with the manufacturer, but no matter how much the chips are cooled, some of this heat generates a response. This phenomenon is known as “dark current.” Fortunately, there is a solution, and that is to take a “dark frame.”
Amateur astronomers take a dark frame when there is no light falling on the CCD chip. Covering the CCD camera or capping the objective of the telescope usually will make it dark enough for this exposure. The dark frame must be of the same duration (exposure time) as the image. In addition, the dark frame should be made immediately after the image exposure, while the CCD is at the same temperature as when the image was taken. This will duplicate the production of electrons due to heat in the original exposure. The dark frame is later subtracted (“dark subtraction”) from the image by computer processing.
Another correction factor for CCD images is known as a “bias frame.” This is taken prior to the dark frame and is, in effect, a zero-time dark frame. In a bias image, the CCD is cleared and immediately read without opening the shutter. This frame represents the inherent noise in the electronics and is not zero. Because there is noise associated even with reading the bias frame, a number of bias frames are taken and averaged together to reduce the read noise.
Do we have an image yet? Almost. One more correction factor needs to be applied. Because a CCD chip is composed of up to millions of pixels, it is not realistic to assume that every pixel is the same. Some may be more sensitive to light (or heat), others a little less so. We must obtain a uniform value for all pixels and this is done by taking a “flat field” exposure.
A flat field basically averages the sensitivities of all the pixels. Flat fields are taken by pointing the telescope at an object with very even illumination. Some CCD imagers use the twilight sky as their target. Others use the interior of their observatories or a large piece of grayish paper board. Whatever is used, the resulting image shows the problems caused by everything – dust, vignetting in the optical system (which cuts off the edges of the image), differences in pixel sensitivity, etc. The imaging software then goes to work comparing each pixel with the flat field and producing a much better image.
The combined process of first subtracting the dark frame and then adjusting the data by using the flat field is called “image calibration.” This process becomes almost automatic for CCD imagers and produces higher-quality images.
I remember the “old days” of astrophotography. Telescope drives were not quite good enough to compensate totally for Earth’s rotation. The solution was for the observer to sit at the eyepiece of a guide telescope – perhaps for hours – making miniscule corrections in right ascension and/or declination. Nobody thought that was fun or looked forward to it in the least.
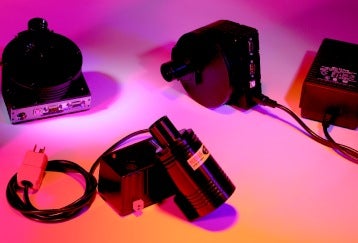
Today, an observer can use a “guiding CCD” camera, which is attached to the guide telescope of the optical system. Once a guide star is located and targeted, the control software of the camera keeps the star centered on a certain number of pixels (depending on the star’s apparent size on the chip). A guiding CCD used with a separate telescope can allow even film astrophotos to be made without the need for observer guiding.
Some manufacturers have eliminated the need for a second CCD camera in one of two ways: (1) Part of the chip is used as a guiding CCD; or (2) A second, much smaller CCD chip, in close proximity to the first, is built into the mounting for the camera and is used as the guiding CCD. The second option assumes a setup where the telescope’s motions are controlled by a computer into which the guiding CCD’s information is sent.
Because CCDs work by accumulating light and recording the electric current given off by the photoelectric effect, not all the light need be gathered in the same exposure. Multiple exposures can be made and then “stacked” with appropriate software. The software also aligns the images – a very important feature.
There are two reasons amateur astronomers stack images. The first is to overcome the effects of seeing. By taking a large number of short exposures, the best images can be selected and combined into a single image of greater quality than one exposure of equal time. The second reason to stack images is to overcome the effects of a not-quite-aligned telescope drive. A drive error will be much more apparent in a 50-second exposure than in a 1-second exposure. Taking fifty 1-second exposures and stacking them produces, in this example, a drive error only 2 percent that which would be seen in the longer exposure.
The formula to determine the pixel scale of your telescope/CCD combination is
where s is the pixel size in microns; f is the focal length in mm. If your telescope’s focal length is measured in inches, the formula becomes
The term “binning” refers to the combining of adjacent pixels for the purpose of capturing more light. Pixels are binned 2×2 or 3×3. In the first case, four times the amount of light is captured and in the second case, nine times the amount. This reduces exposure times by those amounts. Unfortunately, binning reduces the scale of the telescope/CCD system. For example, if your unbinned scale is 3″ per pixel, using 2×2 binning will increase this to 6″ per pixel.
Binning is advantageous to certain systems. If your pixel scale is 0.5″, for instance, and your typical image size is 2″, you will decrease exposure time by binning. Binning mostly is used for imaging large celestial objects where a larger pixel scale is acceptable, but it also has been used for asteroid astrometry (measuring the positions of asteroids) to allow the right pixel scale to be achieved.
A relatively new method of doing asteroid astrometry is by a technique called “drift scanning.” Sometimes referred to as time-delay-and-integration (TDI) mode, drift scanning utilizes a telescope/CCD setup without a drive that is pointed at a particular spot on the sky. Attempting to image a celestial object this way would result in a hopeless blurring of the image. But drift scanning depends on the apparent motion of the stars.
The CCD chips of setups in drift-scan mode are aligned so that Earth’s rotation causes stars (and other objects) to move exactly along the columns of pixels comprising the chips. Using imaging software containing options for drift scanning, pixels within columns on the chips read out at the same rate at which the stars appear to be moving, called the sidereal rate. Thus, the light from a star (or asteroid) falls on different pixels within the column but is added together to form a single image. The result is a long, thin image in which point sources appear as points, not streaks. Many new asteroids have been discovered by this method.
The advantage to drift scanning is in the cost of the setup and the types of telescopes that may be used. With drift scanning, only the optical tube is required – no mount! Some amateur astronomers who use drift-scanning methods literally have bolted their telescopes to steel beams. And, for the first time, large Dobsonian-mounted telescopes may be used for asteroid work because the mount plays no part at all in acquiring the image. Be certain to check with your CCD camera manufacturer to ensure their software contains the option of drift scanning.
In drift scanning, the amount of time it takes for a star to complete its passage over an entire column of pixels is known as the “integration time.” Of course, the longer the integration time, the more electrons can be built up, allowing a fainter objects to be imaged. The integration time depends on three factors: number of pixels per column, pixel scale, and the distance of the scan from the celestial equator.
At the celestial equator, the sky drifts at a rate of 15″ per second. Changing the declination of your scan changes this rate by the cosine of the declination. Thus, at a declination of either 30° N or 30° S, the sky is drifting at approximately 87 percent the rate at the equator, or about 13″ per second.
As an example, let’s imagine a telescope/CCD system with a 2″ per pixel scale and in which the CCD chip has 700 pixels per row. The integration time, if the system is pointed at the celestial equator (declination = 0°), will be
15″ per second / cos 0°
or 93 seconds, approximately.
If the same system is pointed at declination 30° (north or south), the equation becomes
15″ per second / cos 30°
or 108 seconds, approximately.