This article is an excerpt from The Great Comet of 2013, a special issue published by Discover and Astronomy magazines. You can purchase your copy of the 68-page definitive guide to Comet ISON at www.Astronomy.com/CometISON.
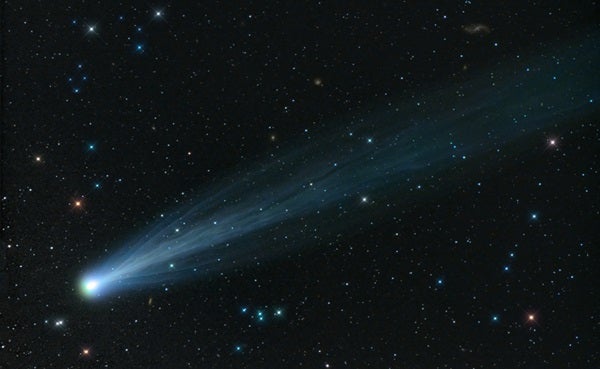
Unlike many forms of astrophotography, which can be costly and complex, shooting bright comets is a surprisingly straightforward yet greatly rewarding pursuit. Keep just a few points in mind, and you can start capturing spectacular images of these celestial visitors quite easily.
For bright comets like Comet ISON (C/2012 S1), a digital single-lens reflex (DSLR) camera equipped with a standard lens (Canon’s 18–55mm lens, which the company includes with many models, is a good example) and mounted on a sturdy tripod will suffice. Remember that you will need to operate the camera in manual (“M”) mode. That will give you full control over its settings.
Focusing is, of course, important, but it can be a bit tricky at night. Select a bright star, the Moon if it’s up, or even the comet itself if it is sufficiently bright. Many DSLRs today come with a “live view” mode, which allows you to focus a magnified live image on the camera’s display, making accurate focusing much easier.
Next, set the lens aperture to its widest value (the lowest f/ratio) and the ISO (the sensitivity of the camera’s sensor) between 400 and 800. For times when Comet ISON appears fainter, higher ISOs in the 1600 to 3200 range may yield better results. Beware, however, because the higher the ISO, the more electronic noise you’ll record.
Another must-have for any form of astrophotography is a sturdy tripod. That said, if your tripod is carrying only a digital camera, you can get away with a pretty light one. Just make sure it doesn’t have too much flex.
You’ll want a remote or cable shutter release to take an exposure without actually having to touch the camera. Many of today’s DSLRs have various modes that let you take either a single shot or a time-delay series. You trigger the exposure by pressing the shutter release button, but the camera waits a few seconds to let the vibration your finger introduced disappear before actually operating the shutter. I have used this mode on many occasions with great success.
When it comes to exposure times, “experiment” is the operative word. No firm guide exists for all situations. How long you expose a shot will depend on a combination of how bright the comet and sky are. Remember that bright comets are often found in a twilight sky. In general, however, keep single exposures shorter than 15 seconds to avoid having Earth’s rotation show up as star trails. The higher the focal length of lens you use, the less time you have to avoid trailing. You can sidestep this issue by mounting your camera on a “driven” mount — one with a motor to compensate for Earth’s motion — but such an accessory is quite expensive.
A short exposure, unfortunately, may show little detail. That’s why I encourage you to take a series of images that you can stack together instead of a single shot. Such a combination will not only brighten the comet but also smooth out noise, which becomes especially important if you use a high ISO setting. Several programs can stack exposures.
Of course, with a telescope equipped with a charge-coupled device (CCD) camera, Comet ISON can become visible even when not at its peak.
You can use any telescope to shoot comets, although fast refractors and Newtonian and Ritchey-Chrétien reflectors are often the favored choices of observers because they combine wide, flat fields of view and fast f/ratios. And while you can employ a DSLR mounted to the telescope, many observers use astronomical CCD cameras. A dedicated CCD camera certainly is not cheap, but it offers the best image quality. Using it will take some steps not needed with DSLRs, such as taking and applying dark frames and flat fields to fully calibrate the images first before you apply further processing.
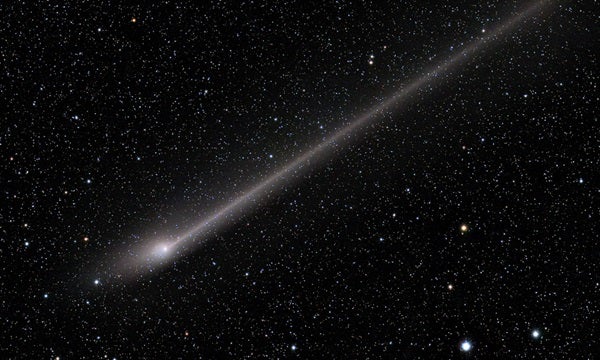
When you examine a comet image you took through a telescope, you’ll immediately notice that the comet is moving with regard to the background star field. This isn’t a problem with your scope’s drive. What you’re seeing is the comet’s actual orbital motion. Some comets move much faster than others, but typically a single exposure longer than 5 minutes will result in the comet trailing in the image.
The easy solution is to take several short exposures. So, instead of one 5-minute exposure, take five 1-minute exposures and then stack the resulting images, aligning on the comet itself. This will result in a nice sharp comet but a trailed star field. Still, this method is the one most comet imagers use.
One cost-effective way to photograph comets is by using remote telescopes. Usually, these telescopes are in extremely dark locations, so they represent a great solution for those people stuck under cloudy or light-polluted skies. For a modest fee, you can log onto a telescope online and control it in real time to target the object of your choice.
Most of these services provide real-time views of the sky so you can monitor the weather above their locations. In addition, all allow you to view the images from the telescope as you take them, and then let you download your data in whatever format you choose so you can process it.

