Key Takeaways:
Last column, I discussed the “Lighten” and “Darken” blending modes in Photoshop, which you can use as an effect on an underlying layer. However, there are more powerful methods of combining blending modes.
One is to enhance images according to an object-oriented approach. This month, I want to show you how to first use the “High Pass” filter on an image and then use “Darken” as an operator (something that has an effect on something else) blending mode for even finer control.
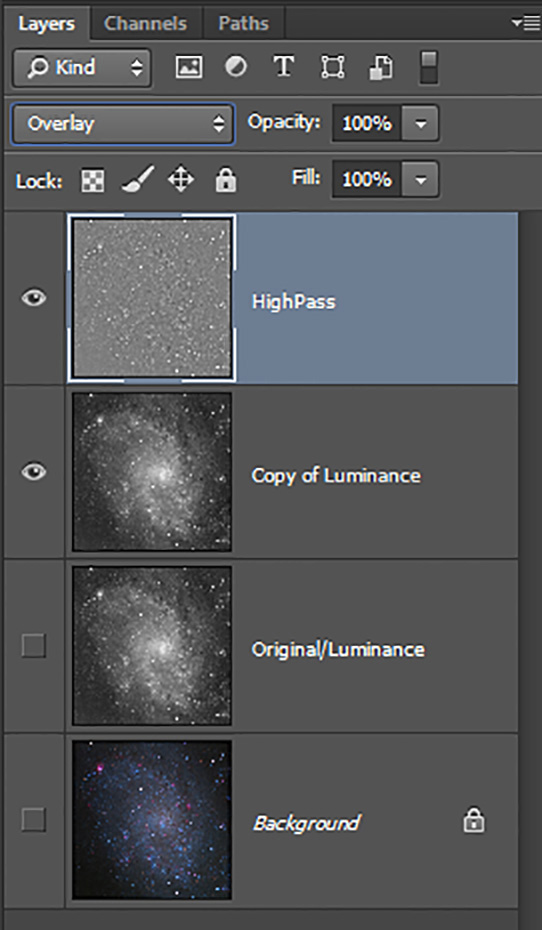
The author created an original luminance layer with two copies above it. He applied the “High Pass” filter to the upper layer and blended with “Overlay.” He didn’t use the bottom image.
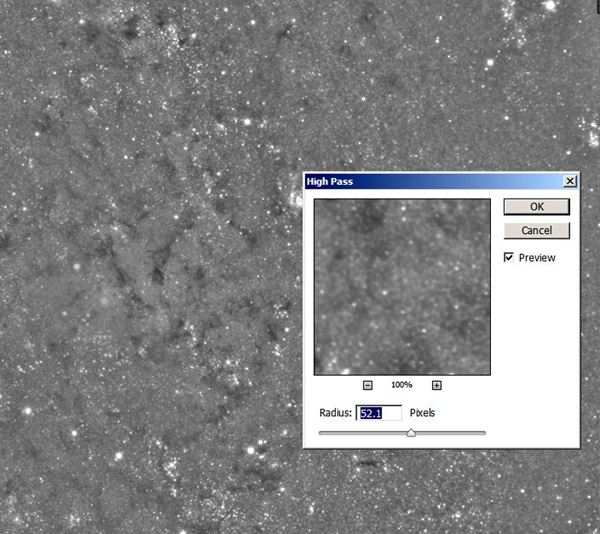
The standard technique for using the “High Pass” filter on a luminance layer is to make two copies of it (left image below). On the upper layer, apply the “High Pass” filter by selecting “Filter,” then “Other,” and finally “High Pass” so that you see features of the scale you wish to capture — and ultimately enhance — through blending.
Adjust the “Radius” slider to vary the scale-size of details in the object. For galaxies, these features could be spiral arms (large radius), dust lanes (medium radius), or ionized hydrogen (HII) regions (small radius). When you are satisfied, apply the filter and examine the gray image that results (middle image). This image functions as an operator image when used with the “Overlay” blending mode on the lower copy of the luminance image.
“Overlay” will enhance structures in the “High Pass” filter layer that are brighter than the mid-gray value, making them brighter. Likewise, with “Overlay” active, those features that show up as darker than the mid-gray value will become even darker. The “High Pass” filter layer is a map of what features at a given scale are being made brighter or darker with “Overlay.” This contrast adjustment is striking and not often used at 100 percent strength. Instead, adjust the opacity of the “High Pass” (operator) layer to vary the effect.
As an example, I recently used a “High Pass” filter with “Overlay” on an image of the Pinwheel Galaxy (M33). After I applied the filter, the nearly resolved stars and HII regions became brighter while the dust lanes darkened. However, the small, bright structures within M33 needed no enhancements. Trying to bring out more detail in them made the image look overprocessed. On the plus side, the additional contrast made the dust lanes much more attractive.
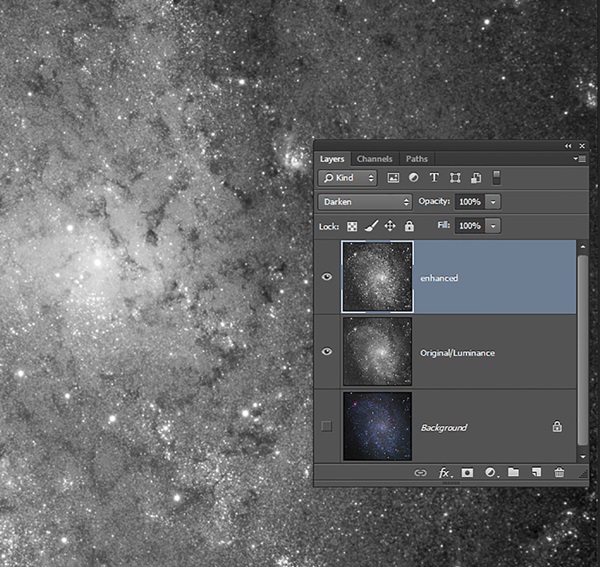
The puzzle becomes finding a way to enhance only the dust lanes without affecting anything else. Here’s how I did that. First, I created a “High Pass” layer with a medium-to-large scale and applied the “Overlay” blending mode as described above. Then I merged the “High Pass” layer with the copy of the original M33 layer to create my enhanced image. Finally, I blended the two remaining layers using the “Darken” blending mode (right image).
Although the final image shows enhancements in both bright and dark regions of M33, by blending with “Darken,” I brought out only the dust lanes (as I wanted) without having the brightening effect of the “Overlay” mode visible. This is a powerful way to globally control an image by using “Lighten” or “Darken” as an operator to separate combined effects into only those that are beneficial.
I think you’ll find that by using this technique, you’ll be able to fine-tune the details in your data and make the final result more realistic.