In this column, I’ll explain an easy way to quickly increase contrast in both brightness and color for objects that lack distinct features. Several of the features in Photoshop enhance contrast in layers that are copies of themselves. By far the easiest one to manage is the “Soft Light” blending mode.
A good case in point is an object like NGC 488. This beautiful galaxy has tightly wound spiral arms with intricate dust lanes and details at the smallest scales.
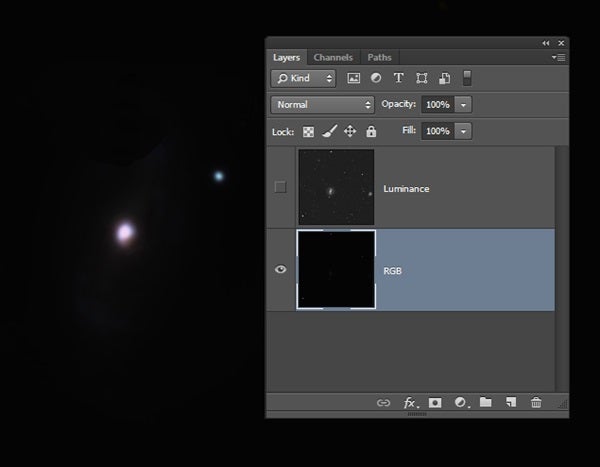
Image #1. At the start of processing, this version of NGC 488 had contrast unacceptable to the author.
All images: Adam Block
It is difficult to see these features because the contrast is modest, and the adjustments necessary to reveal the inner regions severely flatten the brightness profile of the galaxy. Image #1 shows the stage in processing that I consider insufficient in contrast.
Several of Photoshop’s blending modes are conditional effects based on the grayscale value of one of the two layers. If the value is less than 50 percent gray, one effect occurs, and if the value is greater than 50 percent gray, you’ll see a different effect.
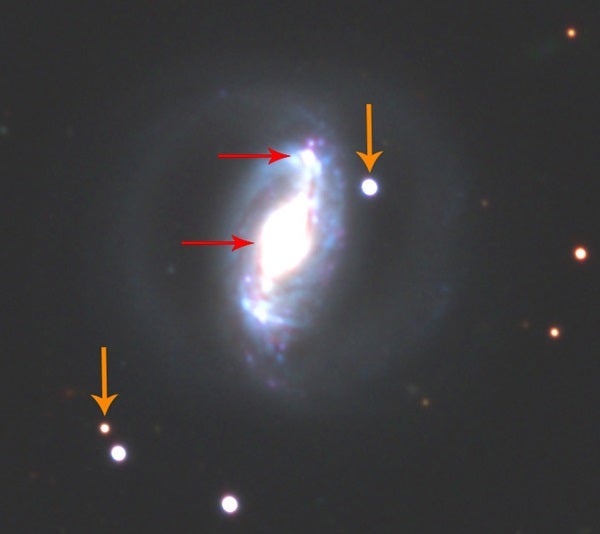
Image #2. The author plotted input versus output of grayscale values of the soft blend on a copy of a grayscale tablet. This is a typical contrast curve weighted slightly more toward darker pixels.
In the case of “Soft Light,” a burn effect occurs with pixels less than 50 percent gray (as measured from the bottom layer) and dodging is applied for pixels brighter than that mark. The burning that occurs darkens values less than 50 percent gray a bit faster than the dodge effect brightens the brightest values, and leads to a soft-light feeling.

Image #3. This is the author’s raw blended image of spiral galaxy NGC 488. Improvement already is starting to show.
Image #2 shows the resulting S-shaped curve I plotted to illustrate that it certainly is a contrast-enhancing blending operation. This curve is typical of producing contrast in the outputted values but note that the bottom left (small grayscale values) are slightly more strongly affected.
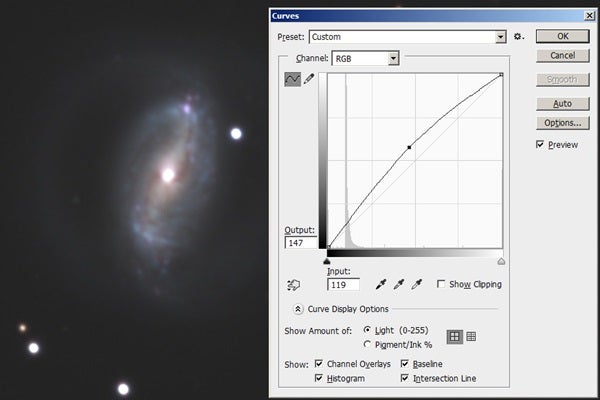
Image #4. This screenshot from Photoshop shows that the author created a copy of the image and a strongly clipped and blurred object mask.
Image #3 is the result of blending the original image of NGC 488 with its copy. Above a certain threshold, the increase in contrast is appealing. Faint pixels and the sky become catastrophically clipped. Thus, this “Soft Light” technique requires a strongly blurred object mask that hides all parts of the image below the minimum brightness threshold (Image #4, top row, right). Also note that the “Soft Light” blend affects the color values as well. Where darker colors are chosen, by virtue of the burn application, a modest increase in color saturation occurs. The final result (Image #5) dramatically shows the benefits of the technique by enhancing the contrast of dust lanes and making the color of the spiral arms more distinct and attractive.
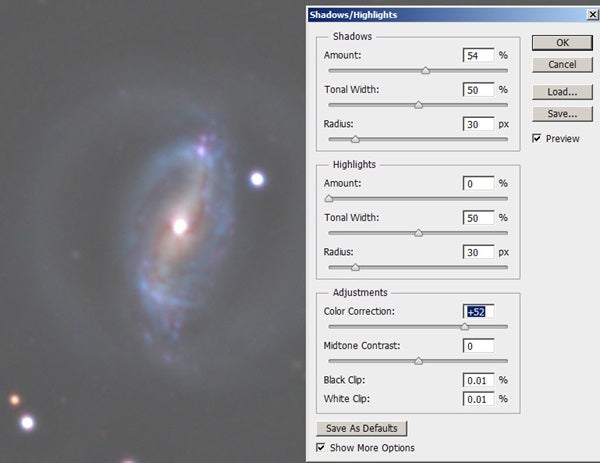
Image #5. The author’s final version shows more detail than any previous incarnation. You can view a high-resolution version of this at www.adamblockphotos.com/ngc-488.html.
This technique is easy to master. You should apply it to reasonably clean and high-signal images at the end stages of processing. Simply make a copy of the image in another layer, blend with “Soft Light,” and apply the appropriate object mask. Because this is a global effect, you won’t invest much time seeing if it offers an enhancement you like. Large diffuse nebulae and face-on spiral galaxies tend to be good subjects for this kind of processing.