From the December 2012 issue

Stars and nebulosity

February 2013: Crab Nebula (M1)
By | Published: December 21, 2012 | Last updated on May 18, 2023
Erika-Rix
The Crab Nebula (M1) is a supernova remnant located in the constellation Taurus. On September 12, 1758, it became the first object French comet hunter Charles Messier cataloged. What makes this nebula special is that we associate it with a supernova event that people witnessed and recorded in 1054.

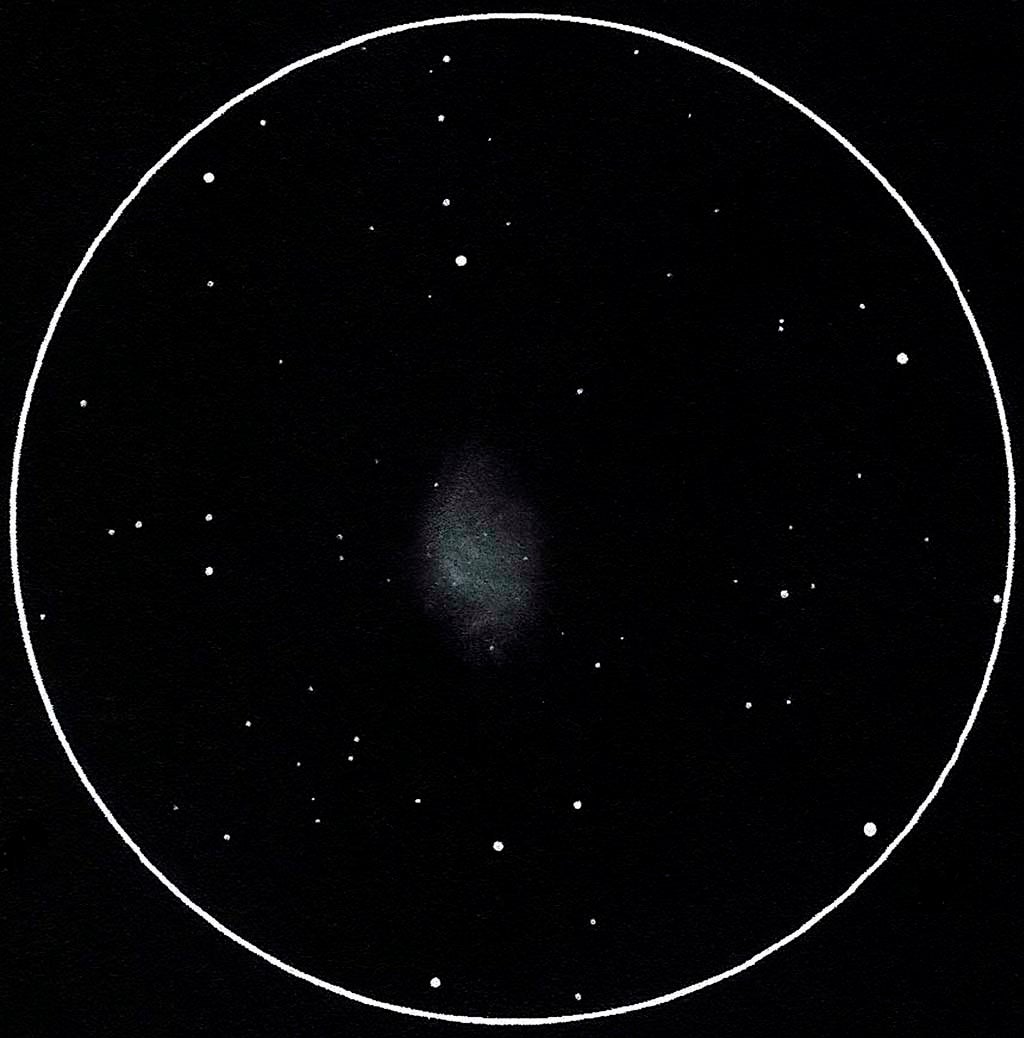
Through small apertures, M1 may seem mediocre — an ob-long hazy patch with a brighter center. With increased aperture, however, hints of filamentary detail with a few superimposed stars become apparent. You may even see the Crab Nebula’s pulsar (the rotating remnant of a high-mass star) through 18-inch or larger telescopes.

Sketch-1
When beginning a sketch, if you first visualize triangular patterns that connect the brightest stars throughout the eyepiece’s field of view, your star plotting will be more accurate // All images: Erika Rix
All this makes M1 a great sketching target you can use to hone your skills as you tease out its subtle nebulosity. So I’ll use it as a convenient peg for a general review of the sketching process.

Comfort and patience are key factors in rendering a detailed eyepiece sketch. Take advantage of averted vision and slight telescope movement (as you lightly tap the tube) to detect faint stars and changes in surface contrast. Also, try different filters to enhance the view.

To get started, all you need is a clipboard, a soft red light with an even glow, a piece of white paper with a circle drawn on it to represent the field of view, a #2 pencil, and a blending stump. The latter is a cylindrical drawing tool made of rolled paper, tapered at the ends, used by artists to smudge drawings.

Sketch-2
Make a small patch of graphite on one side of your sketch with your #2 pencil. Then “load” your blending stump (upper right) with it as necessary. Use this to draw layers of nebulosity.
If you’re feeling adventurous (or after creating several sketches), try using a super-fine black felt-tipped pen for the brightest stars and an assortment of mechanical pencils for the others. Both kneaded and vinyl erasers also are handy additions to your sketch kit.

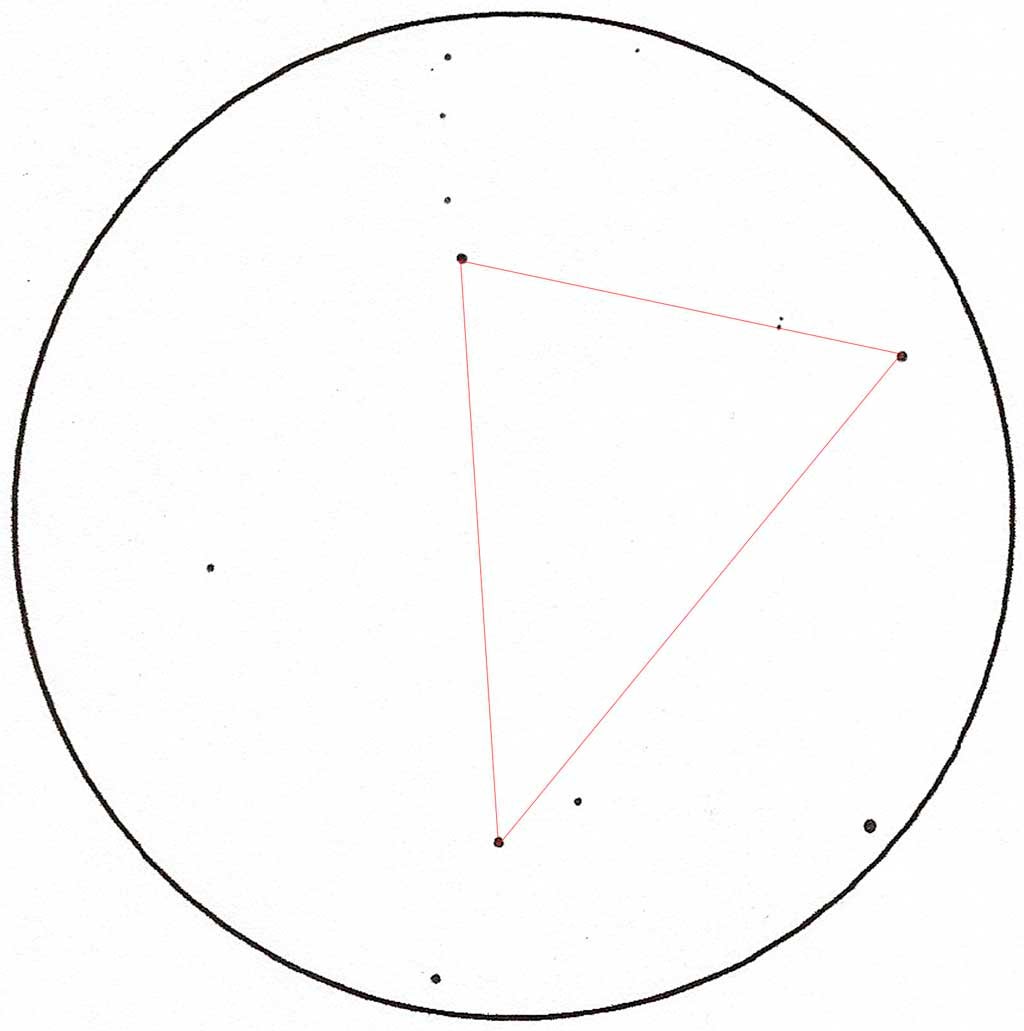
Begin by framing the star field and centering the target, adjusting magnification as needed. Record the brightest stars to the sketch by holding the pencil straight up and down on the paper while gently twisting it with slight pressure. You’ll use these initial stars, called anchors, as reference points for all other marks you place on the sketch. Visualize triangular patterns or curves that connect the stars. Render star magnitudes by the amount of twist and pressure of the pencil. The brighter the star, the higher the pressure you’ll need to apply.

Sketch-3
Drawing a nebula, or in this case, a supernova remnant, is much easier if you use a blending stump. It lets you control how dense the object appears and how lightly to feather the edges.
Next, create a small patch of graphite off to the side of the sketch with your pencil. Rub the tip of a clean blending stump across the patch to “load” it with graphite. If there’s excess graphite on the stump, simply rub the tip on a clean section of paper to remove it.

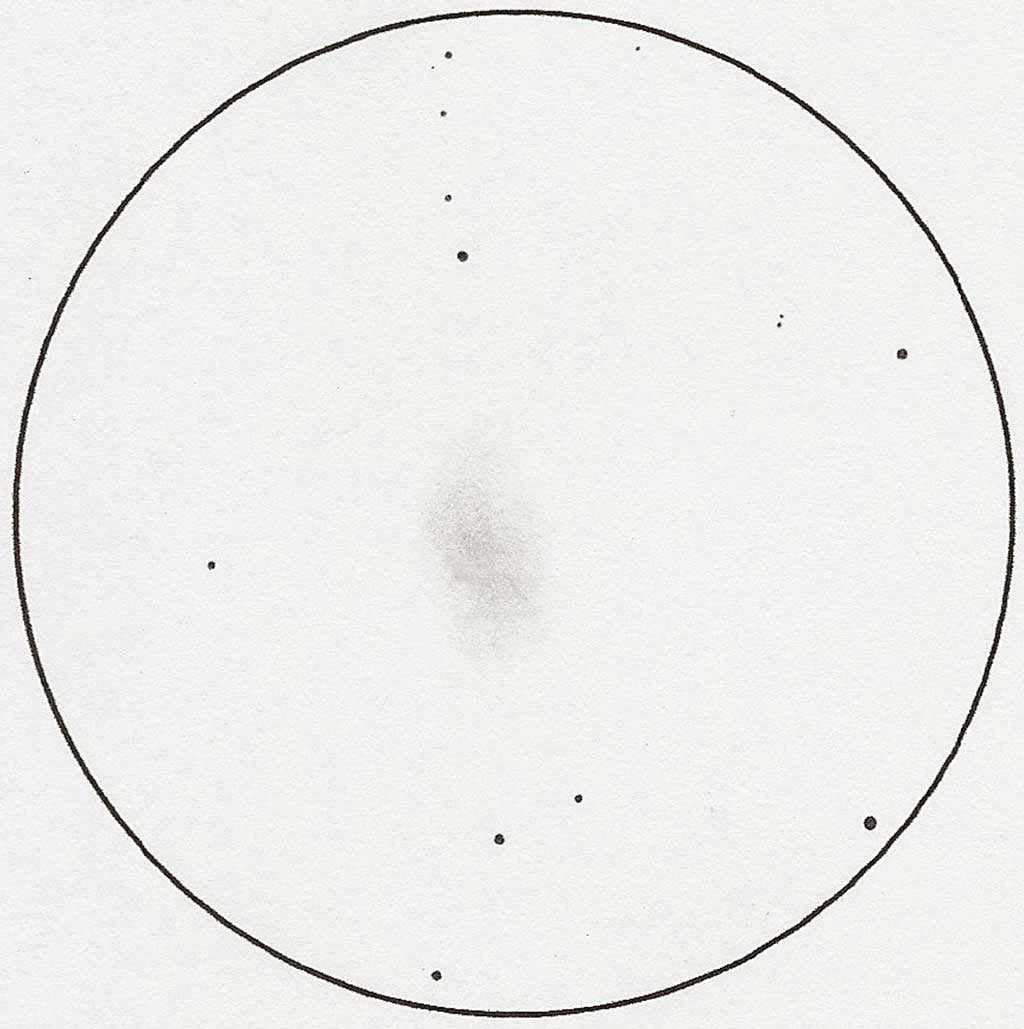
Draw the brightest area of the supernova remnant with the loaded blending stump. Lighten the pressure as you reach the diffuse edges. Reload your blending stump as needed and work in layers to build up additional contrast. As you peer through the eyepiece, look for variances in tonal contrast. One way I enhance these variances is by turning off or dimming my red light while viewing. Finish this part by carefully lifting any excess graphite off the sketch using a kneaded eraser.

Completed-sketch
The author digitally scanned her completed sketch of the Crab Nebula and then inverted it using Photoshop. She observed through a 16-inch f/4.5 reflector on a non-tracking Dobsonian mount at 120x, employing an Oxygen-III filter.
Once you render the nebulosity, add any faint stars you detect. Work within one small section at a time to plot the remainder of the field and make any necessary adjustments to star magnitudes. To complete the sketch, add relevant data such as date, time, orientation, equipment, sky conditions, and any other observation notes. Finally, I recommend spraying your sketch lightly with a fixative for preservation.