How do I make my eyepiece sketches look more realistic?”
It’s a question observers often ask when trying to re-create the lifelike appearance of an eyepiece view. Thankfully, our images can benefit from several methods. They include techniques at the eyepiece, digital enhancements, and drawing tablets. In this month’s column, I want to chat about the first of the three — eyepiece techniques — and I’ll take a couple examples from the constellation Auriga the Charioteer.
The first is open cluster NGC 1778. At magnitude 7.7, it’s a fairly bright unconcentrated target with a low star count. Through an 8-inch telescope at 150x, you’ll see a patch of 20 stars stretching northwest to southeast. Through a 16-inch scope, 40 stars form two chains separated by a starless lane. The brighter northern chain has a 10th-magnitude double at its northern end.
Attention to detail is essential for realistic sketches. So while you draw NGC 1778 and its surroundings, you’ll want to include as many stars as possible. Concentrate on accurate placements and correct magnitudes. The amount you twist your pencil along with the pressure you apply regulate star brightness.
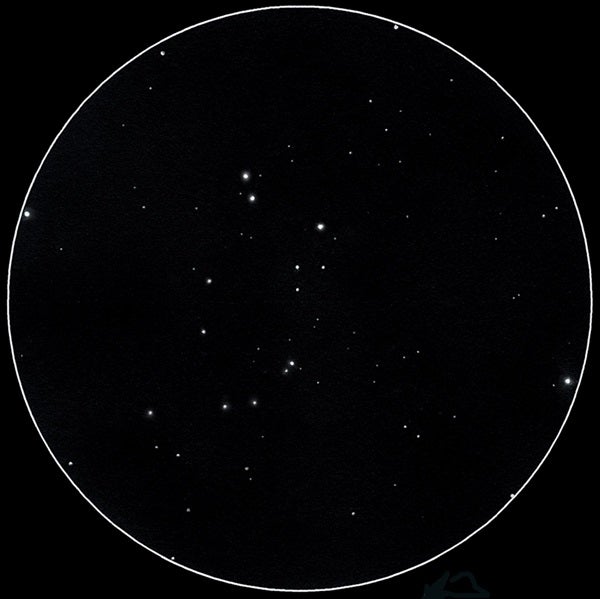
For added dynamic range, try a superfine black felt-tipped artist’s pen for the brightest stars, a #2 pencil for the medium-bright ones, and a 0.5mm mechanical pencil for the faintest. A blending stump lightly loaded with graphite will softly illuminate the brighter stars. Place the tip over the star. Then, with a light circular motion, create a diffuse “glow” around it.
Now that you’ve finished a star cluster, you can tackle nebulosity. The object I’ve chosen is NGC 1931, an emission nebula coupled with a young open cluster. You’ll find it 0.8° east-southeast of magnitude 5.1 Phi (ϕ) Aurigae. The nebulosity surrounds a tiny open cluster that contains only five bright stars. Amateur astronomers aptly refer to this pair as the Spider and the Fly.
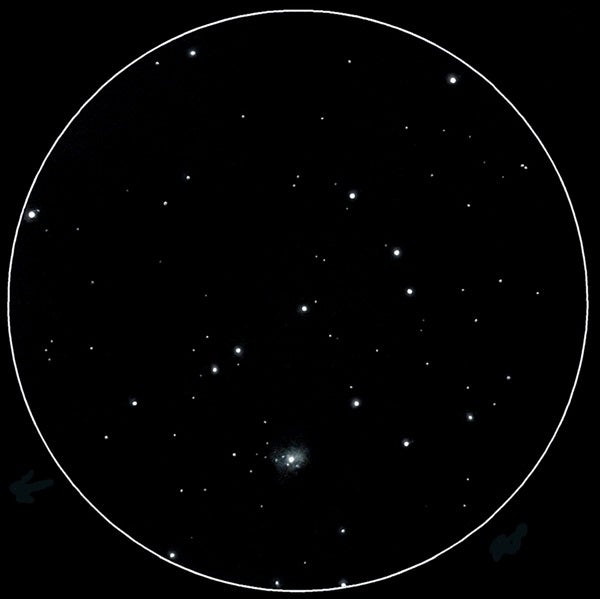
Through an 8-inch telescope, you’ll see a 1′ glow surrounding an 11th-magnitude star. It lies 3′ north of a star pattern resembling the body of the constellation Scorpius, which extends 10′ east to west. Peering through a 16-inch scope, you’ll notice that the nebulosity elongates to become brighter toward the northeast and fainter to the southwest. Four stars curve northwest of the central star.
When sketching a diffuse object, it’s important to build up the nebulosity carefully. What you want to do is illustrate the subtle tonal variances and diffuse boundaries that emission (or reflection) nebulae are known for. Drawing with a graphite-loaded blending stump works best. Add extra layers of graphite as needed, then blend.
Learning tricks of the trade like these will set you on course for producing realistic eyepiece sketches. In my next column, I’ll focus on a pair of objects within our solar system.
Do you have a sketching question? Contact me via email at erikarix1@gmail.com.