You’ve purchased your first sketching kit. Congratulations! But you may be wondering about the paper stick that came with it. It’s called a blending stump, and although I’ve touched on its use before, it deserves further attention.
Blending stumps come in a variety of sizes, and I suggest you get an assortment. Each is a tube of tightly wound paper with a pointed tip. Used for blending darker and lighter areas, they’re also handy to draw with.
One way you can draw with a blending stump is by “loading” it with graphite. This technique involves rubbing the stump’s tip through a patch of graphite you’ve deposited on a sheet of paper. At this point, you can sketch with it. Another method removes pastel layers from your drawing — a technique I’ll explain in a future column.
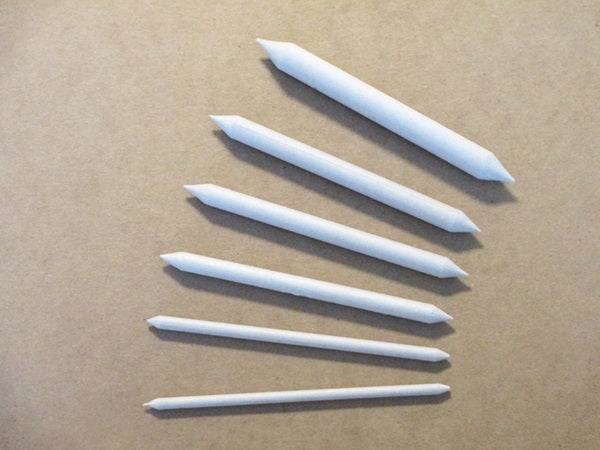
For optimal control, clean and sharpen your blending stumps with a block of medium-grit sandpaper. I do this several times during my sketching session. To give you a good idea of how I use this great implement, let’s look at a few examples.
I’ll start with the marvelous peculiar galaxy Centaurus A (NGC 5128). It sports an active supermassive black hole at its core, and, at 12 million light-years away, it’s a strong extragalactic source of radio radiation. Observers in the U.S. who live south of 40° north latitude will be able to view this beauty near their southern horizon.
A 4-inch telescope reveals a bright central bulge bisected by a prominent dust lane that runs northwest to southeast. Through larger scopes, the rift appears scalloped with a hazy central patch and a 12th-magnitude star to the west. You’ll see a 9th-magnitude star superimposed on the galaxy’s southeastern edge.
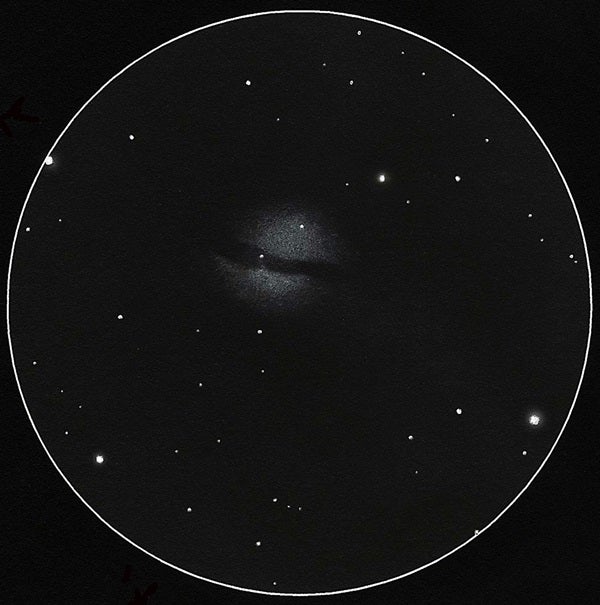
After sketching the surrounding star field, load a small blending stump from a patch of graphite outside your sketch circle. Draw the borders of the galaxy’s dust lane by holding the blending stump almost perpendicular to the paper, using its tip. Then, angle the stump and use the side of the tip to draw the remainder of the galaxy.
My second example is the most massive globular cluster in the Milky Way, Omega Centauri (NGC 5139). Edmond Halley discovered it in 1677. It’s a whopping 150 light-years across and contains more than 10 million stars. At magnitude 3.9, this naked-eye object is a treat through all telescopes, but it really knocks your socks off when you use large apertures because of the sheer number of resolvable stars. Make sure to look for (and sketch) the streamers of suns resembling claw marks in the cluster’s southwestern quadrant.
Again, first sketch the surrounding stars. Include enough of them to position the cluster. Then, starting with Omega Centauri’s bright center, use the edge of a large blending stump to build up the object’s brightness.
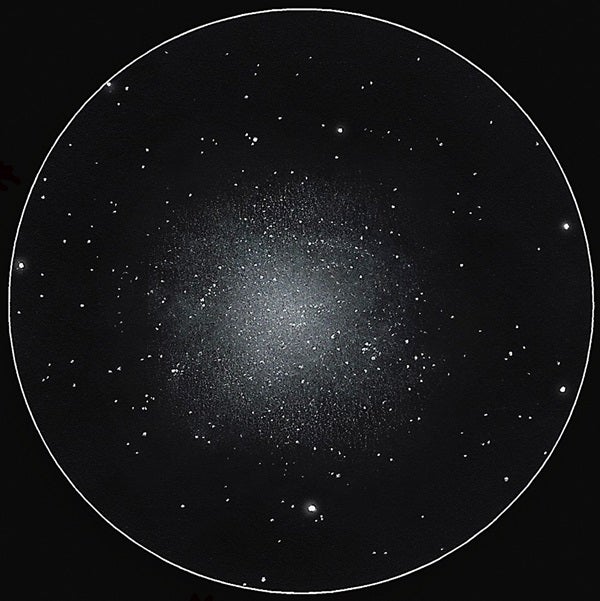
Adjust the pressure you use so you can depict both the tonal variances in the unresolved regions and the resolved streams of stars. This will take some practice, and you’ll likely quit several sketches before you’re happy with the result. Stipple unresolved stars lightly with a pencil, followed by resolved stars and, finally, the remaining field stars. (Stippling is a technique whereby you create a pattern using small dots.)
Remember, one of the keys to getting the most out of your blending stumps is to keep them clean and sharpened. With a light touch and practice, you’ll wonder how you ever managed without them.