Key Takeaways:
- Proper attire for cold-weather observing is crucial, emphasizing layered clothing, insulated footwear, head coverings, and hand/foot warmers to mitigate heat loss.
- Preventing and addressing dew formation on optical equipment is vital, recommending methods such as using a dew removal system or carefully warming the equipment, while cautioning against wiping dew directly.
- Telescope tube currents, caused by temperature differences between the telescope and ambient air, can degrade image quality; mitigation strategies include waiting for temperature equilibrium or using a fan.
- Understanding weather patterns, specifically air masses and their impact on atmospheric seeing and transparency, is essential for optimal observing conditions.
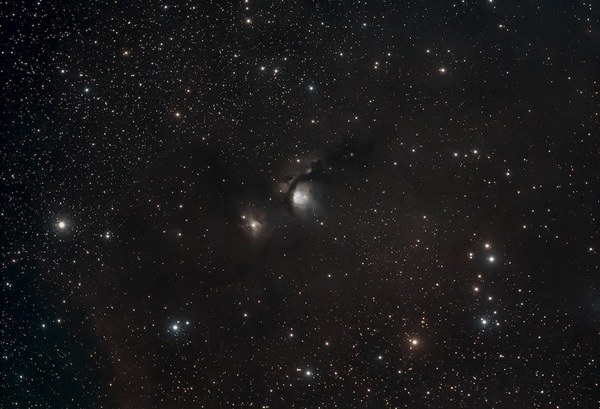
I’ve heard it said that it takes a special kind of amateur astronomer to observe in winter. I only partly agree. Yes, cold weather is hard on equipment and observers alike. But the prospect of observing the Witch Head Nebula (IC 2118), the Intergalactic Wanderer (NGC 2419), or Thor’s Helmet (NGC 2359) on a clear winter night is difficult to resist. So, for those of us not born with antifreeze coursing through our veins, the key lies in preparation.
And do note that while this story specifically relates to winter observing, similar conditions occur during other seasons at high altitude. Being prepared only starts with the right equipment — for your optics and for yourself. The next step is having what you need for what you didn’t expect. If you’re observing at a remote site, you need to overpack. You probably won’t use everything you bring. But in a cold, isolated environment, the right tools at your fingertips might just mean the difference between life and death.
How to stay warm
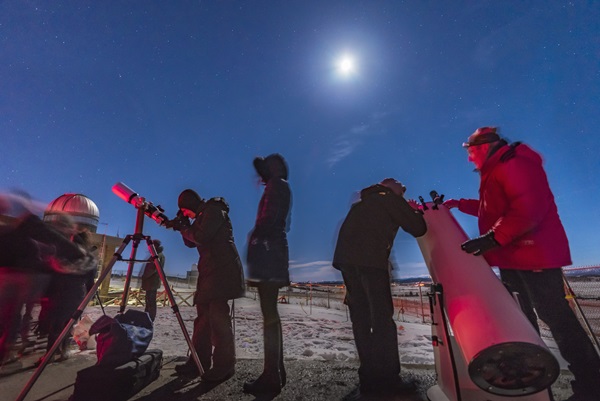
By far, the most important body parts to keep warm are the head and the feet. While it’s a myth that you lose the most heat through your head, you definitely don’t want to leave your head uncovered while the rest of your body is wrapped up. Similarly, the ground will quickly sap your body heat if you’re wearing only thin-soled shoes.
My personal headgear is a soft fleece pullover head cover. I can cover everything but my eyes — though on all but the coldest nights, I have the front pulled down to expose my nose and mouth. Over this I wear a felt hat. I don’t like the down-filled hood of my parka — although it’s really warm — for one reason: When the hood is up, the material rubbing on itself makes so much noise that unless I stand still, conversation is difficult. Also, I just feel better being able to hear what’s going on around me. It’s also worth noting that hoods can diminish peripheral vision — another important safety consideration.
As for boots, go for the best you can get that will let you drive your vehicle. I usually wait until I reach my observing site to change into my cold-weather boots, but you never can tell if an emergency might require you to make a quick exit. My boots are comfortable, light, and have a thick insulated lining in the sole to prevent heat transfer downward. I also recommend pairing them with warm socks of wool or a wool-like synthetic material.
You’ll also want to bring hand-warmers, and lots of them. They’re great when they work but are notorious for not lasting as long as the package says they will. Keep an active one in each of your jacket pockets and slip them into and out of your gloves or mittens to quickly warm up your hands. If you’re wearing gloves, pulling your fingers out of the finger slots can warm them up a lot faster. If your feet get cold, toe warmers are also available, although with the right boots and socks, you shouldn’t need them.
Anyone who has lived in a cold environment knows it’s best to dress in layers. The method that has worked for me starts with light fleece long underwear and pants. (I always opt for pants with lots of pockets to store all my gear close at hand.) To keep my torso warm, I wear a T-shirt underneath a thin, long-sleeved flannel shirt and a fleece zip-up jacket. I top it all off with a down jacket. The last item isn’t cheap, but if you can afford one with true goose down, it’s worth the extra cost.
If you’re particularly sensitive to low temperatures, consider a ski rescue suit as your outer layer. My wife, who feels the cold more acutely than I do, wears one and says it does a great job at keeping the wind and cold from reaching her.
If you’ll be spending the night, pick a sleeping bag with the appropriate temperature range for your area. The better ones are a bit expensive, but get a good one and you’ll be happy you spent the extra money. Here in the desert southwest, we have different requirements than observers in Wisconsin or Norway. Note, though, that most bags advertise rated temperatures that are much lower than the real temperature at which you might feel comfortable. If you take a bag out at its actual rated temperature, you might find its insulation inadequate. This is why veteran campers will tell you to add 15 degrees Fahrenheit (8 degrees Celsius) to a bag’s rated temperature. That will give you the real temperature at which you’ll start to feel cold in the bag. Some sensitive souls may want to add 20 F (11 C).
The worst way to use a sleeping bag is to place it directly on the ground. Even a slight bit of insulation will cut down the amount of heat loss between your body and Mother Earth. I start with a lightweight, plastic, queen-size, fold-out platform that lifts the bag about 18 inches (46 centimeters) above the ground. On the platform, I put a battery-powered, self-inflating air mattress. That raises the bag another foot or so. These two steps make a big difference in comfort, but even a few layers of folded blankets between the mattress and the ground can help.
One item you should always have is a Mylar blanket. Often billed as survival blankets, that’s exactly what it may become. Wrapped around you, Mylar will trap body heat, allowing you to survive all but the most severe conditions. As a cover for your sleeping bag, it will keep you warmer, provide a shield against wind penetration, and keep frost off your bag. These blankets are also waterproof and weigh next to nothing. You can find Mylar blankets at any quality camping or outdoor store, or many places online.
What to expect from the sky
OK, you’re all bundled up, but have you chosen a good night? The smart amateur astronomer is usually also an amateur meteorologist. As you check the weather the day before and day of your observing trip, one of the most important details to look or listen for is information about air masses.
A cold air mass (air colder than the ground) is likely to produce convection, which will probably result in cumulus clouds. The atmosphere in such a region is generally clean, so transparency will be good. But because the air is turbulent, the seeing (atmospheric steadiness) will suffer. In this case, you can expect to see celestial objects to the limit of your vision, but they’ll be twinkling.
On the other hand, a warm air mass (warmer than the ground) is likely to create stratus clouds, haze, or mist. The atmosphere in this region probably will hold a lot of dust. This makes the air steadier but less transparent. So, the transparency will not be great, but the seeing might be.
You also can usually count on bad seeing for at least 24 hours after a front (the boundary between warm and cool air) or a trough (a stretched-out area of low pressure) passes through your area. And believe it or not, seeing is often best when ultra-thin cirrus clouds are overhead. The exception occurs when those clouds are moving in one direction and there are lower-level cross winds.
Acclimating your telescope
One of the biggest threats to high-quality winter observing is tube currents in your telescope. While the seeing might be good, the image through your scope may not be. This is often because the temperature of air in the tube is different than the ambient temperature outside. But how can you tell whether it’s the sky or your scope causing you trouble?
Aim at a fairly bright star and defocus the image. This will allow you to detect air currents in your telescope by looking for circular motions inside the image. If your out-of-focus star has “hair” or a “ring of fire” around the outer edges, and if these patterns change subtly over a period of 30 seconds to five minutes, you have image-damaging tube currents. But note that you may not always be able to see these effects. To deal with the problem, your goal is to get your mirror to the same temperature as the outside air. The easiest solution is to wait an hour or so; but if you’re impatient or on a timetable, you can use a small, battery-powered fan to blow the warmer air out of the tube.
How to prevent dew
The second problem you might face while out observing is dew, those small droplets of water that condense on cool items at night. I happen to be writing this from the desert environment of Tucson, where dew is rare. But I’ve lived and observed in many other locations, so I know that dew on a telescope objective can be a session ender.
Dew forms on optics when the temperature of your telescope falls below the dew point (the temperature at which atmospheric water vapor will condense on an object). This happens because when the weather is clear, your telescope essentially radiates its heat to the sky, which is at a colder temperature than the atmosphere around it. If the air temperature is near the dew point, the heat loss will cool your scope and dew will form on it. And if it’s really cold, frost can form on your optics.
Of all telescope designs, the one most affected by dew is the Schmidt-Cassegrain. This type of scope has a large glass corrector plate at the front end of the telescope tube, and that glass plate can easily promote dew formation once it gets cold enough. But refractors and reflectors are certainly not immune, nor are eyepieces and finder scopes. To prevent dew from forming, you have to bring the telescope back to a higher temperature than the dew point. This is somewhat of a balancing act, though. You don’t want to overheat the optics because then thermal currents (see earlier) will degrade your observations.
If you notice dew forming on your scope, you can deal with it in a number of ways. But there’s one way you absolutely should not deal with it: Never wipe the dew off with any type of cloth. The danger of scratching your lens or mirror is too great.
In the field, you can turn on your car’s heater and move the tube inside to warm it up just a little. Leave the optics uncovered so the dew can evaporate. You also can use a cordless hair dryer or one that plugs into your car’s power outlet. Set it at the lowest air volume and run it for only a few seconds. Make sure to keep it several inches away from your equipment.
Those who often observe in winter usually buy a dew-removal system, which installs on the telescope. Several are available, such as the Kendrick Dew Removal System (www.kendrickastro.com) and the Orion Dew Zapper (www.telescope.com).
Finally, when you’re ready to pack up, beware of condensation forming on items after you transfer them from the cold outside to a warm inside location, be it your car or house. Observers have told me that they put small objects (cameras, eyepieces, etc.) in zip-close plastic bags before bringing them inside. If you do this, any condensation will form on the outside of the bag and not on the delicate equipment inside.
The key to winter observing
Comfort is everything — especially in winter. If you’re uncomfortable, you won’t concentrate as well and, worse yet, you may cut your session short. Having the right gear with you will assure high-quality observations of the Orion Nebula (M42), Sirius B, and lots more.


