Safety First
The purpose of this article is to teach you some basic techniques to photograph lightning at night. Safety is your responsibility. In America each year, lightning kills an average of 73 people and injures 300 others — don’t be one of them.
“Be cautious and use common sense,” warns Michael Hutchinson of Muncie, Indiana, who first suggested this article. “Most of my lightning images were made from the safety of a shelter. The last thing you want to do [is] set up your equipment in the middle of a storm. Plan well ahead. Watch your local weather channel for upcoming storms, find a safe shelter ahead of time from which to work, and set up before the storm starts.”
Learn all you can about lightning safety. Start by checking out the National Oceanic and Atmospheric Administration’s National Weather Service website at www.lightningsafety.noaa.gov/outdoors.htm.
Imaging nature’s fury
The easiest way to photograph lightning is
with a 35mm digital single lens reflex (DSLR) camera mounted on a sturdy
tripod. It’s best if the camera has a Bulb (B) shutter-speed setting
and a terminal for a cable release, which allows you to remotely control
how long the shutter will stay open while using the Bulb setting. A
standard 50mm lens will work just fine for some strikes, but a range of
lenses (from 17mm to 200mm) offers you much more flexibility in framing
either the lightning or the overall scene.
Once you’ve mounted your camera to the tripod, set its dial mode to Manual (M) and its shutter speed to Bulb. Next, move the focus-mode switch on the lens to Manual Focus (MF) and focus to infinity.
The ISO regulates the image sensor’s sensitivity to light. Typically, ISO speeds range from 100 to 1600; the higher the ISO, the faster the sensor collects light, but the noisier the image becomes.
F/stop determines the size of the adjustable aperture opening in the
lens. The range varies depending on the lens, but it can be anything
from f/1.0 (wide open) to f/22 (small). The smaller the opening, the
less light gets in, and vice versa.
Exposure time is the length of time you keep the shutter open. The longer the exposure, the brighter the image.
You’re the chef!
Like ingredients in a recipe, the three variables listed above
work together. It’s up to you to experiment with the settings and
exposure times to create the overall “dish.” Even then, you still have
to consider a highly variable ingredient in the mix — namely, the
nearness and intensity of the lightning strikes. Because of that
permanent unknown, no precise formula for success exists. I have a
personal approach to photographing lightning, which I include as a basic
outline to help get you started.
in the frame of either a wide-angle or standard 50mm lens. The first
challenge is to determine the maximum exposure length. I do this before
shooting, because the brightness of the field determines the overall
mood of the image. And that mood (dark and brooding vs. bright and
flashy) depends on your aesthetic vision. If possible, include
foreground and horizon objects in the frame. Here are some general
suggestions for various locations:
City setting: Set the ISO to 100 and the aperture to either f/8
or f/11. Open the shutter for 15 seconds. Examine the image on your
camera’s viewing screen. If you are not satisfied, lengthen or shorten
the exposure accordingly; note that from bright city locations, some
photographers stop down the aperture to f/16 or f/22.
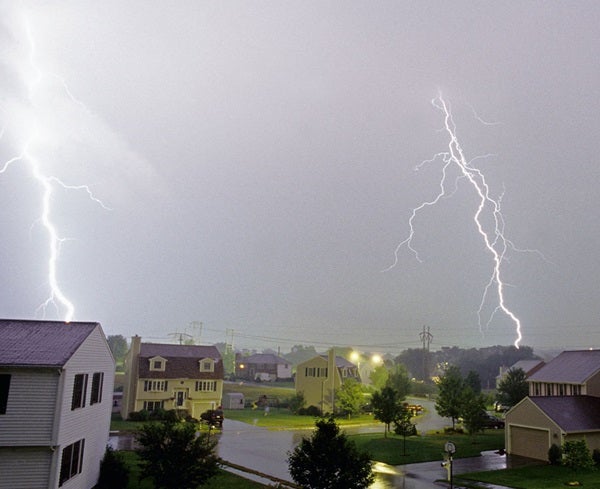
Suburban setting: Set the ISO to 100 and the aperture to f/5.6.
Open the shutter for 20 seconds. If it’s overexposed, either stop down
the aperture to f/8 or decrease the exposure time. If the shot is
underexposed, increase the exposure time by 10 seconds.
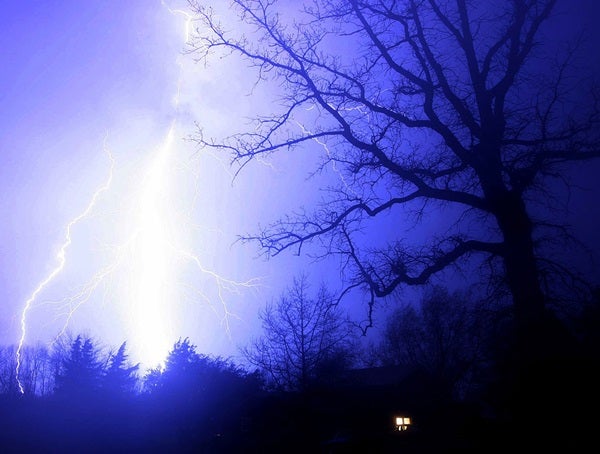
Country setting:
Set the ISO to 100 and the aperture to f/5.6. Open the shutter for 60
seconds. If you want to play (paint) with the lightning and any other
sources of ambient light, increase your ISO to 200 or 400, set the
aperture to f/5.6 or f/8, respectively, and keep the shutter open
longer.
Be prepared to tweak the settings during the storm — after all, you’re dealing with unpredictable acts of nature.
Playing with “fire”
Once you know the limit of your exposure, don’t start shooting. First observe the storm. After you get a “feel” for it (and see frequent strikes), point your camera in the direction of maximum activity and frame the scene. Now, you’re ready to catch some action.
If I expect a strike to occur within 60 seconds, and my exposure time limit is 60 seconds, I’ll wait about 30 seconds before opening the shutter. If no lightning occurs, I’ll end that exposure and immediately start another. If I see a bolt, say, 10 seconds into the next exposure, I’ll have a decision to make: either (1) close the shutter and be happy I got it, or (2) let the image expose for another 50 seconds, thereby increasing my chances of catching another strike.
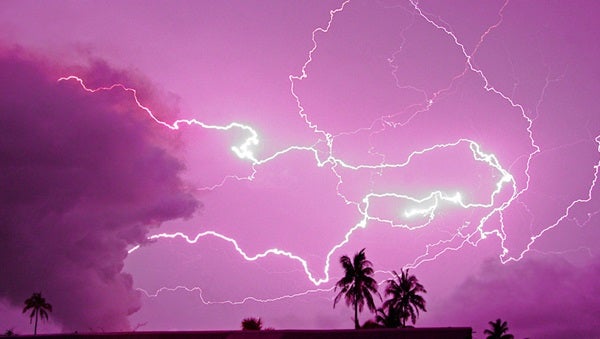
By the way, unlike many ground strikes, which are over in a few millionths of a second, other types of lightning (like intracloud and cloud-to-cloud) can last long enough for you to see it and open the shutter while it happens. Whatever you do, keep shooting and keep aware. Good luck! And send low-resolution images (6″ x 4″; 72 dpi) of your results to someara@interpac.net.