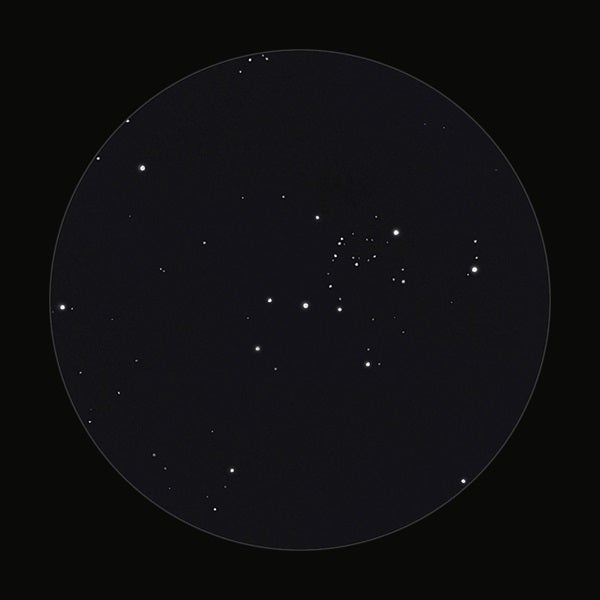
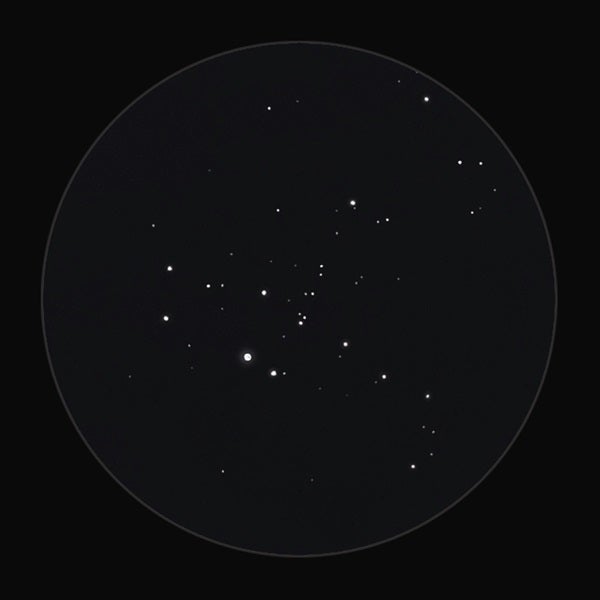
Scanning a sketch and then inverting it to a positive format can lead to unexpected results when it comes to stellar magnitudes. During the scanning process, the faintest stars may become bloated and overly bright, while those that should appear glowing with zeal diminish to look flat and dull. Thankfully, there’s an easy fix that requires only a few steps in Adobe Photoshop to set things right.
Astrophotographer Noel Carboni created software that has 34 Photoshop functions, each with predefined steps fashioned to save time and make processing an image — or a sketch — a breeze. It’s the Astronomy Tools Actions Set, and after you follow the download instructions, you can access it through the “Actions” panel under the “Windows” tab within Photoshop. To purchase a copy ($21.95), visit ProDigital Software at www.prodigitalsoftware.com. Click “Products,” and scroll down to Astronomy Tools.
I’ve found three of the action sets in this software to be particularly handy for star fields. I’ll explain using sketches of the Owl Cluster (NGC 457) and NGC 436, a pair of open clusters in Cassiopeia. The clusters are only 0.7° apart, so if you use low magnification, you’ll be able to spot them within the same field of view 2° south-southwest of magnitude 2.7 Ruchbah (Delta [δ] Cassiopeiae).
The larger of the two, NGC 457, has a prominent shape that sparks the imagination. A variety of names have been coined for it based on the form it most resembles to an observer. Some call it the E.T. Cluster, the Airplane Cluster, or the Kachina Doll. To me, it’s the Owl Cluster because — as Astronomy Editor David J. Eicher noted in 1977 — it bears an uncanny resemblance to a bird with striking eyes (the 5th and 7th magnitude components of multiple star system Phi [ϕ] Cassiopeia), outstretched wings, and an elongated concentration of stars that forms its body. The Owl Cluster glows softly at magnitude 6.4 and stretches 13′ in diameter.
After inverting the scanned version of my sketch in Photoshop, the next step was to reduce the bloated appearance of the stars so that the smallest would appear faintest. Scrolling through the set of available Astronomy Tools actions, I selected “Make Stars Smaller,” and then clicked the “Play” icon. To create a separate layer for the changes, simply choose the “. . . As Layer On Top” action, and press “Play” again.
I ran the “Select Brighter Stars” action set next. This highlighted only the largest stars, which allowed me to adjust their luminosity without affecting the others.
NGC 436 may not be as conspicuous as its neighbor, but it does have a fairly rich concentration of stars that spans 5′ and shines at magnitude 8.8. A chain of three equally spaced stars (of magnitudes 9 through 11) runs 4′ east to west along the southern portion of the cluster. A curved strand of fainter stars forms the shape of a backward bass clef throughout its middle.
When I inverted my sketch of NGC 436, the darkened background of the star field became excessively grainy. Running the “Space Noise Reduction” action set allowed me to soften the harsh background, which produced a more natural-looking result.
Questions or comments? Contact me at erikarix1@gmail.com.


