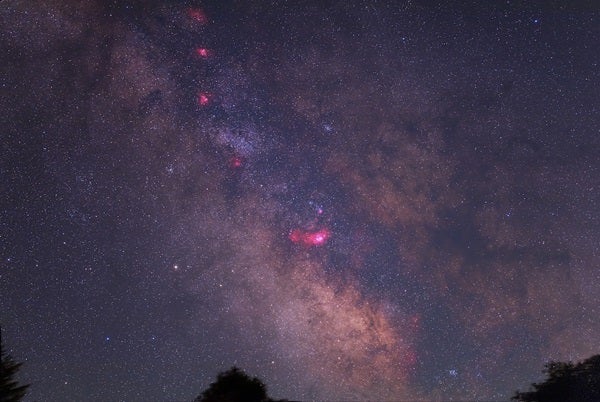
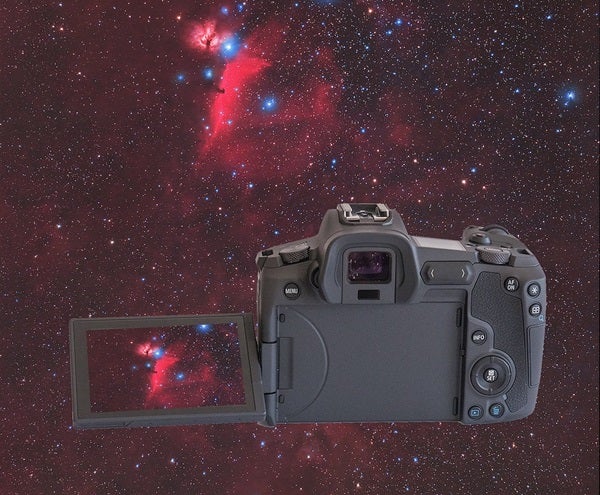
The Canon EOS Ra follows in the footsteps of the company’s 20Da and 60Da: All of these cameras have a special ultraviolet-infrared (UV-IR) rejection filter that allows the transmission of Hydrogen-alpha (Hα) light. As a result, red nebulae that would appear green in normal cameras instead take on a pinkish hue.
The 20Da and the 60Da are older, standard DSLR cameras that utilize mirrors in their viewfinders. The Ra, on the other hand, is a mirrorless camera, so it has a thinner body and doesn’t shake as much as cameras with moving mirrors do.
Previous Canon cameras with mirror-equipped viewfinders relied on Electro-Focus (EF) lenses, but the company also makes a solid adapter that allows you to equip these same EF lenses on their new mirrorless cameras. They even took compatibility one step further, making available another adapter that has a built-in filter slot in its side.
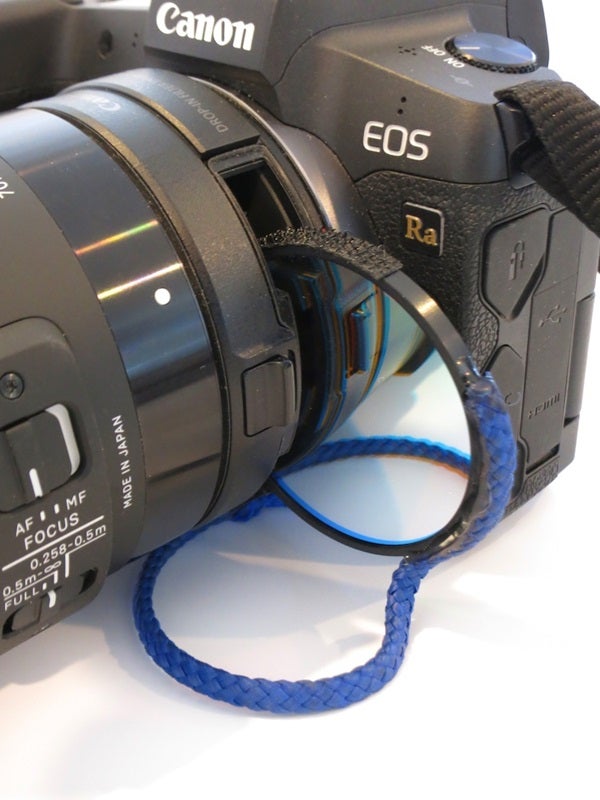
Canon’s standard filters are a rotating polarizer filter and a variable neutral density (ND) filter. The idea with these is to simply slide them behind the lens, and one size fits all. But, I wondered, what about putting an astronomy filter in the slot on the adapter? To date, no one makes a dedicated series of narrowband filters meant for that adapter slot. Canon or other filters designed for this slot have a latch mechanism to secure them in place. However, my Astronomik round 50mm Hα narrowband (12 nanometers) filter with metal edging does not. So, using Bondic brand UV-activated glue, I attached a string to this filter so I could retrieve it from the slot. I also added a thin strip of Velcro to the far edge to help stabilize the filter. Once I inserted the filter, I made sure to cover the filter slot with a small piece of material to keep any incidental light from sneaking in.
There are also clip-in filters that you place directly in front of the Ra’s sensor before attaching a lens. But utilizing the slotted adapter allows you to change filters without fussing with the camera itself. Plus, you can compose the image with no filter, then insert the filter, focus on a bright star, and start shooting. One reason I use a 12-nm Hα filter over a 6-nm Hα filter is because it allows me to more easily find a star for focusing, as the 6-nm filter blocks more light. Another reason is the angle of light: If you are using a fast lens, a broader Hα window works better.
As an important note, when you use a glass filter of any kind behind the lens of a camera or telescope, it is going to change the focus! For example, using an Hα filter pushes the focus slightly past infinity, so you need to use a lens that can focus past infinity as well. Many Canon lenses do this, but if you are using a lens that stops right at infinity, it will not work with a Hα filter inserted behind it as described in this article.
Anyway, if you’re anything like me, you learn by doing. So let’s dive into capturing some beautiful Hα shots of the cosmos with the Canon Ra. Along the way, I’ll share the tips and tricks I’ve learned while frequently using it this past year.
Capturing the data
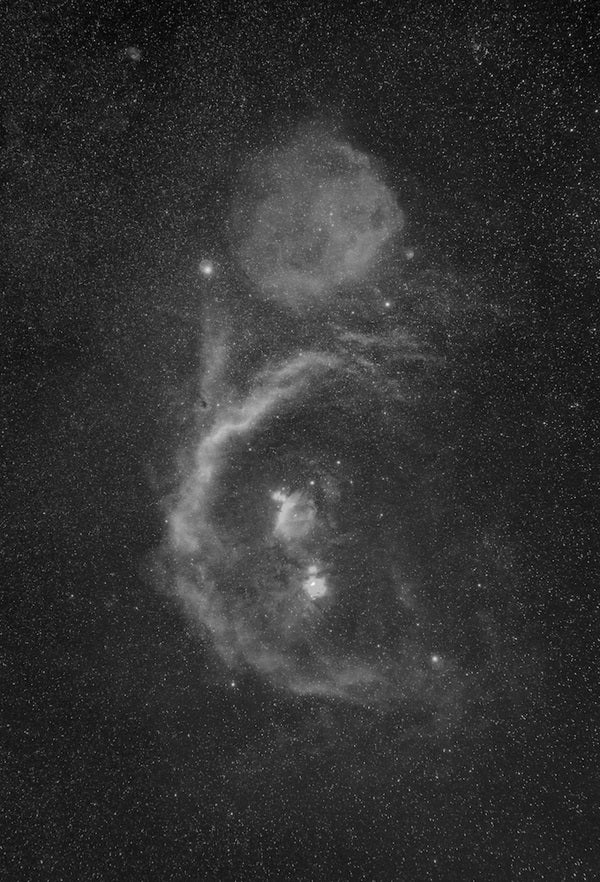
The familiar constellation Orion the Hunter is a great winter target for Hα imaging, and it makes for the perfect testing ground. I begin by taking standard RGB exposures. In my experience, a 70mm lens — specifically the Sigma 70mm f/2.8 Art Macro — very nicely frames Orion in the Ra. To track my images, I use a Takahashi EM 200 mount, but any small mount will work as long as it is polar aligned and has a hand paddle for making right ascension and declination corrections.
Long ago, I discovered you get better results in RGB by taking longer exposures at lower ISOs rather than shorter exposures at higher ISOs. So, I typically take four-minute exposures at f/3.3 with an ISO of 800. Between each exposure, I use a hand paddle to nudge the camera a tiny amount, known as dithering, which makes each exposure slightly different from the others. This is something that comes in handy during processing, but more about that later. Usually, I aim to capture 10 RGB exposures.
When I’m done with the RGB frames, I put a star blur filter on the lens (I use a Hoya Soft B filter) and shoot a frame with flared, unfocused stars. This allows me to clearly capture the stars’ colors. Without it, modern lenses are so sharp and well corrected that stars often become tiny, near-colorless pinpoints.
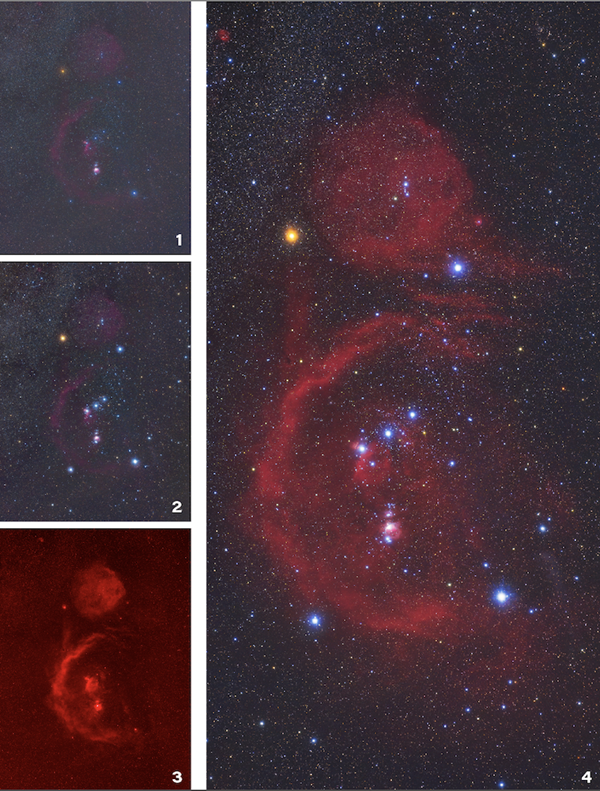
Next, I remove the blur filter and insert my 50mm Hα (12 nm) filter into the adapter slot. Adding this filter changes the focus, so I refocus on a star and increase the ISO to 3200. As you can imagine, the Hα filter blocks a lot of light, so I also must bump up my exposure time accordingly. Each of my Hα exposures last between four and eight minutes, which is why you need good polar alignment. The result is a very red image with pronounced detail. I try to shoot at least five dithered images in Hα.
An alternative approach
There is a more advanced way to add Hα data to your astroimages — one that borrows from CCD imaging. First, while your Hα image is open in Camera Raw, reduce the color saturation to zero. This will make it black and white, but it will also help enhance the Hα details. Combine all the black-and-white Hα exposures in RegiStar, then open that master frame in Photoshop to enhance some more. Specifically, by both sharpening the shot and increasing its contrast, you can make the Hα light really stand out against a dark background.
Now for the CCD trick: Bring the Hα master into Photoshop as a layer on top of the RGB-flare image. Create a Hue/Saturation adjustment layer, then hit the Colorize button. Bring the Color slider to the extreme right (pure red), the Saturation slider to 100 percent, and the Density slider to 50. Create a clipping mask to clip this to the existing Hα layer. Finally, select the now-red Hα layer, change the Blend mode to Lighten, and combine it with your RGB-flare image. This method provides you with more control over the opacity and density of the Hα layer itself.
Processing the images
After I have accumulated all my data frames, it’s time to process them. I capture everything in camera RAW format to preserve as much detail as possible. During raw processing, which I do in Adobe Camera Raw, I clean up each exposure and make any adjustments that will benefit the image (which is the topic that would require several articles to thoroughly explain). Once each file looks as good as I can make it, I save it as a 16-bit TIFF.
Remember how we dithered the frames earlier? This is a technique borrowed from CCD processing to increase the signal-to-noise ratio. After processing the raw images, I upload all the individual image files into RegiStar, which is software that allows you to easily combine and align multiple images into a single composite. I align each filter set of images based on the stars, which appear slightly displaced between each exposure due to our dithering technique. Now, any constant background noise becomes random, and if you average all that noise together, it largely cancels itself out. The result is a master frame for each specific filter that has more and cleaner data than any single shot. I do this for both the RGB frames and the Hα frames.
Next, I use RegiStar to take my three main files — the master RGB frame, the star flare frame, and the master Hα frame — and perfectly align them with each other. (I have detailed my methods for processing in Adobe Camera Raw and Registar on a DVD that is out of print, but I can burn one for you if you are interested. Contact me through www.astrophoto.com.)
Now it’s time for Photoshop. I open the master RGB frame and make any additional corrections I think are beneficial, including some star reduction. When it finally looks the way I want it to, I add the star flare frame on top of the RGB frame as a layer and align the two using the Move tool. I change the blend mode to Lighten, which tells Photoshop to take anything from the star flare frame that is lighter (the flares) and add it to the master RGB frame. Like magic, featureless stars in the RGB frame now have both color and proportional size. You can control the degree of this blend by making the flare layer lighter or darker — a neat trick. I save this new RGB-flare master as a Photoshop file with layers before flattening it to simplify the next step.
Here’s where the real fun begins: adding the Hα data. Following the same process as before, I add the master Hα frame as a layer on top of the flattened RGB-flare image. I again change the blend mode to Lighten and watch as the RGB-flare image acquires all that beautifully red Hα light. Like before, you can control how much Hα light you blend in by making that layer lighter or darker. You can also use a Burn/Dodge tool to selectively add or subtract Hα data from your final image (which is also possible using layer masks, but the process is a bit more complicated).
When you are satisfied with the final RGB-flare-Hα image, flatten all of the layers and enjoy your new Hα-enhanced view of the cosmos. I hope this helps you get the most out of your fantastic Canon Ra camera!

