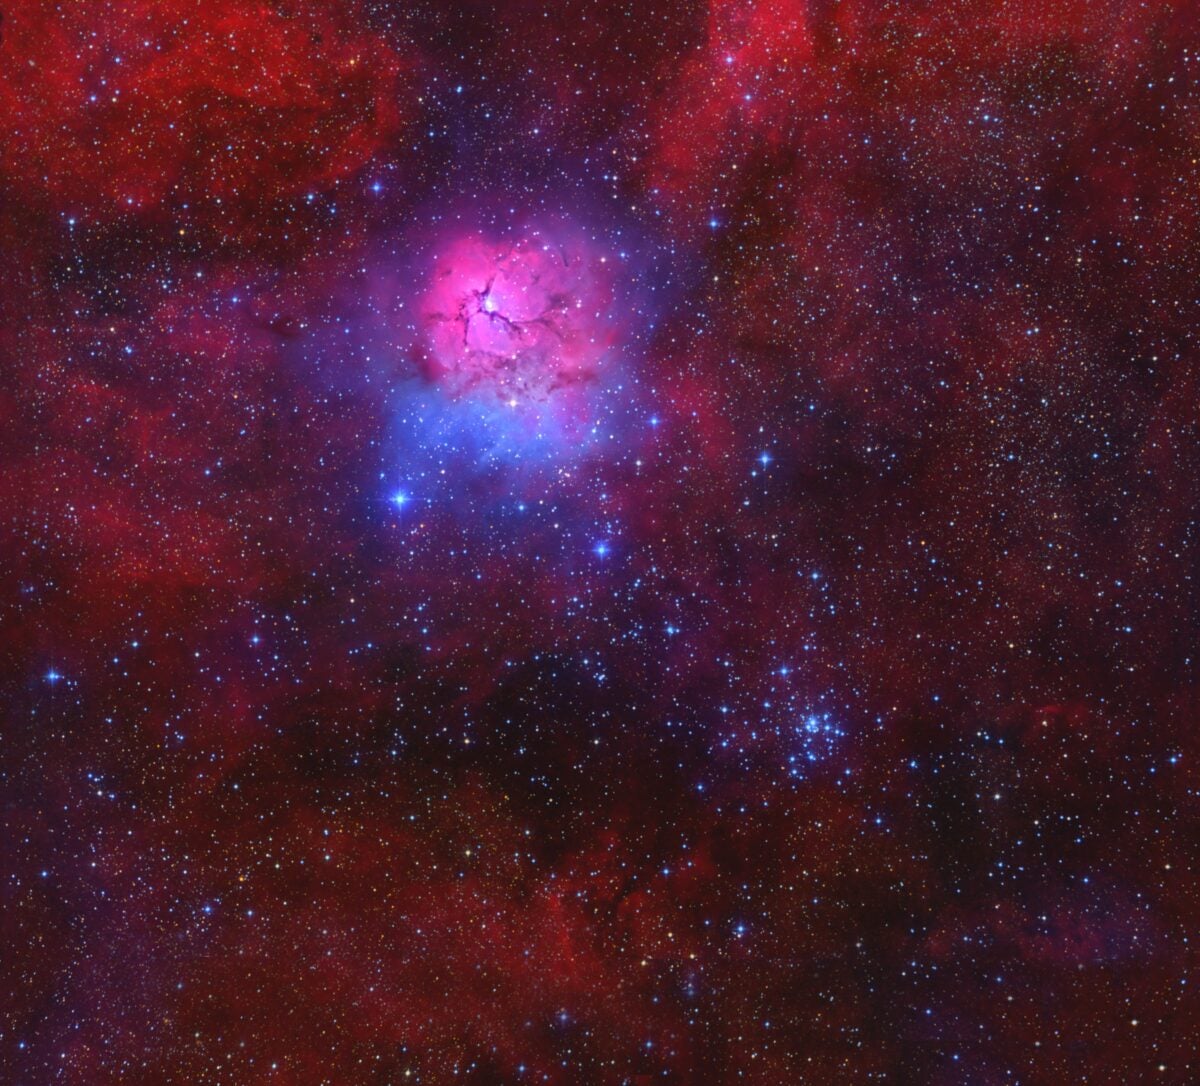
We all gaze in awe at beautiful deep-sky images, marveling at how the best imagers make it look so effortless to produce perfectly framed masterpieces. Such photos always seem to have perfect, pinpoint-round stars forming the foreground for the subject: the gauzy glow of a faint nebula or galaxy.
What we don’t see are the results of the remaining 99 percent of imagers, who tried and failed to create such images because of trailed and blurred stars marring their carefully framed shots.
Autoguiding comes to the rescue by keeping your telescope pointed precisely where you want it, overcoming this novice shortfall and getting you on the road to producing your own celestial masterpieces. So keep reading for everything you need to know about the types of guiding methods and how to select a guide scope, guide camera, and software. I’ll also explain how to balance your telescope and analyze your results. I even provide my suggested workflow to optimize your chances for success.
Why guide?

Accurate tracking to keep an object in your telescope’s field of view as Earth rotates is the first step toward creating clear images, but it’s not always enough, particularly as you increase the telescope’s focal length. And while professional telescopes costing millions of dollars have exquisitely accurate drive systems with sub-arcsecond tracking, the commercially produced mounts available for amateurs vary greatly in this regard. The gears in amateur mounts can have periodic error accuracy ranging from a few arcseconds at best to several arcminutes or more in the worst cases. Although this tracking error is usually the primary reason to guide using a second camera trained on a star near your target when taking exposures longer than a few seconds, there are other, more significant reasons to consider guiding as well.
One is the subject’s altitude above the horizon. Stars’ movements in the field slow as they near the horizon due to atmospheric refraction. The closer you are to the horizon, the worse it gets. So tracking at a constant rate isn’t enough. Additionally, wind may exert pressure on the telescope tube and change its tracking rate in an irregular way.
Another typical issue is declination drift due to poor polar alignment. Just a small offset from the pole will result in a constant north or south drift easily seen in exposures of five minutes or less — especially when shooting subjects near the celestial poles. Even the way you hang power and data cables on your instruments can have effects. If, say, the USB cables to the guide camera or primary camera are tugging during the exposure, it can cause a tracking offset that leads to strangely trailed star images.
Finally, without guiding on a target star near the subject, you can never get a perfect alignment on stacks of consecutive images if subsequent shots have drifted in any way from the first shot in a set.
How guiding has evolved
For most of the past century, guiding was accomplished via a separate piggyback guide scope — usually a long-focus refractor equipped with an illuminated high-power crosshair eyepiece. The imager would watch the guide star throughout the entire exposure and manually press a button on a hand box every few seconds to change the drive speed and keep the star centered if it drifted off target. This could get quite interesting (read: uncomfortable), depending on where the telescope was pointed and where the eyepiece was attached.
Thankfully, we don’t have to go through that today! The advent of small, affordable CCDs — and now CMOS guiding cameras and software — has relieved us of that burden. Today’s guiding cameras can make corrections every one to two seconds for hours on end without testing the limits of human concentration or the uncomfortable body contortion of manual guiding. The future of accurate autoguiding looks bright, with many manufacturers now including the required optics and camera built into the mount itself for a completely integrated system.
Guiding methods
There are four ways you can set up a guiding system for your telescope, depending on its optical configuration and the mechanical design of the telescope cradle. The least expensive route is an off-axis guider installed directly between the camera and focuser, while the most expensive is a separate guide scope. The latter is the simplest to use but comes with a grab bag of problems to overcome. Your personal best option for guiding will involve consideration for your budget, mounting configuration, camera weight and balance, and the type of objects you intend to shoot.
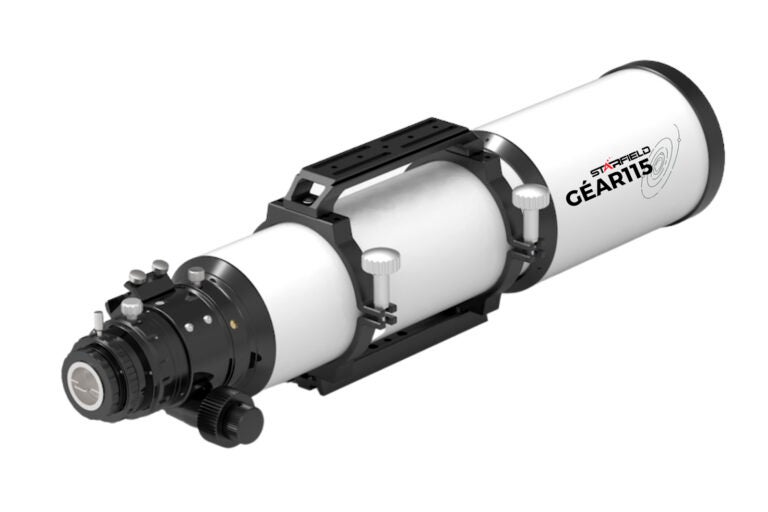
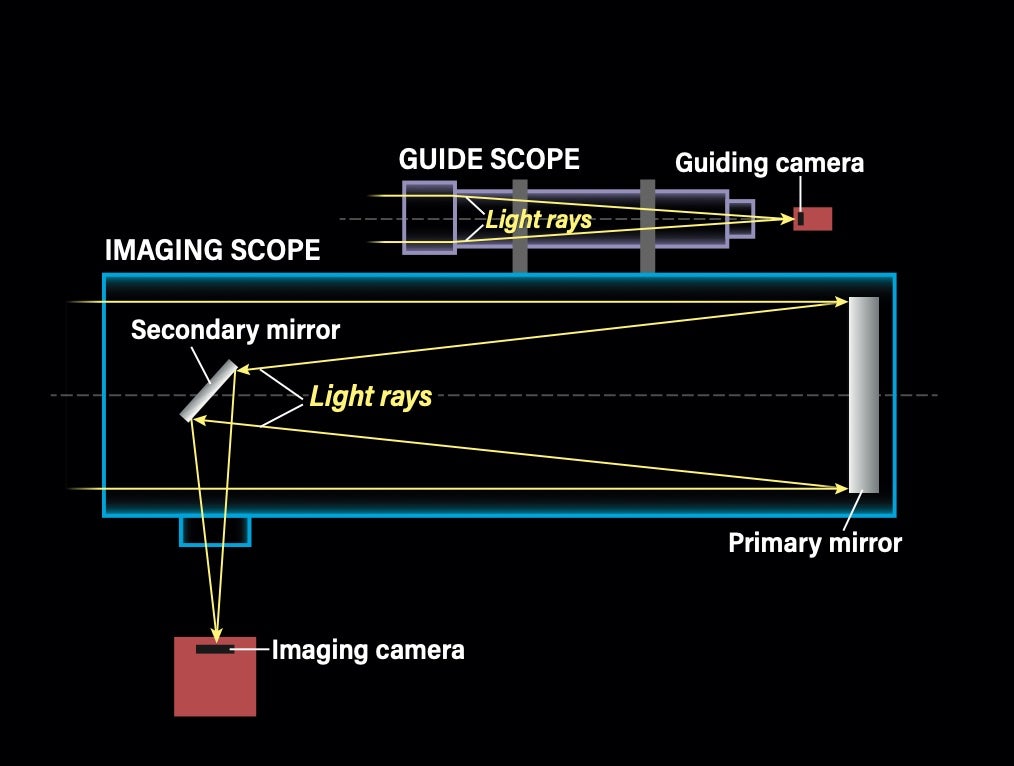
Separate guide scope. This option uses a small refractor mounted piggyback on the cradle or directly on the tube of the main instrument. It must be adjustable so it can be centered on either the target or a nearby suitable guide star. Years of experience have dictated that the aperture and focal length of the guide scope should be no less than a quarter the aperture and half the focal length of the main imaging instrument. You can add a Barlow lens to the optical train to ensure shorter-focal-length guide scopes meet this requirement. Although not required, the ability to install a low-power eyepiece for guiding target centering is a big plus with such an arrangement.
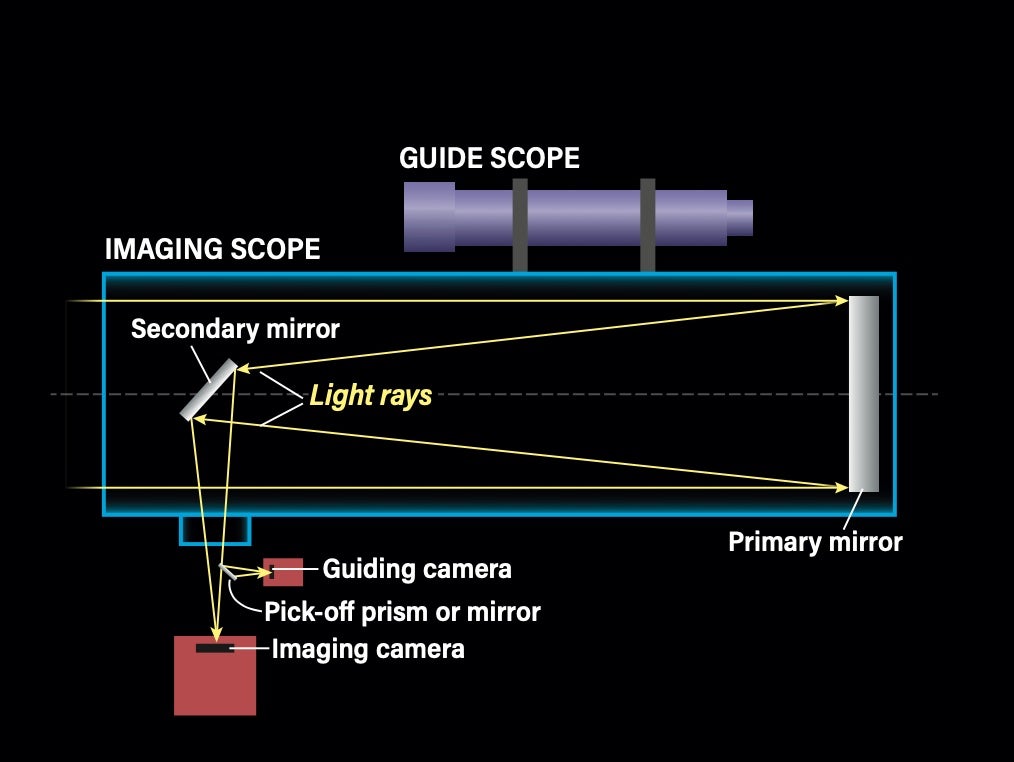
Off-axis guiding. A second commonly used method is an off-axis guider, essentially a short tube installed between the camera and focuser drawtube, with an adjustable pick-off prism to intercept guide stars just outside the normal field of the imaging chip’s short dimension. Any coma correctors or field flatteners must be installed in front of the pick-off prism to ensure the roundest possible guide stars. But to be honest, I find these devices difficult to use. While they’re the best at capturing tracking and flexing errors during the exposure, finding a suitable guide star can be daunting in the limited field. If you go this route, also be aware there is a steep learning curve and you may encounter objects with no usable guide stars available.
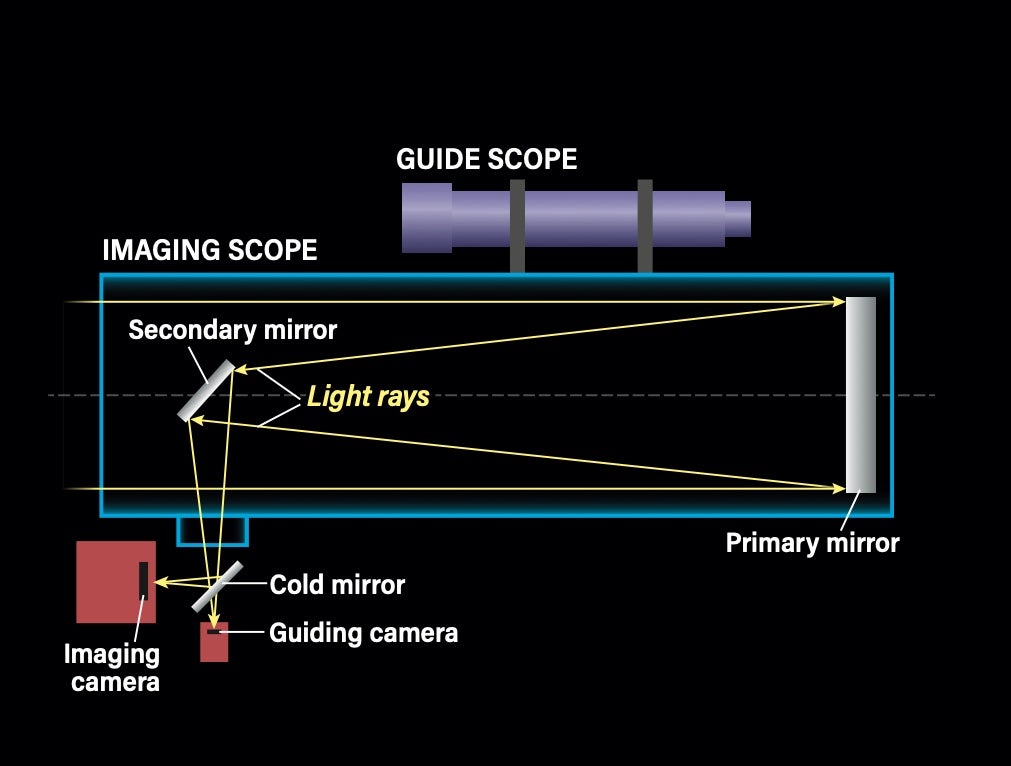
On-axis guiders. Also known as ONAG guiders, this recent addition to guiding options can be perfect for bright comets, asteroids, or any targets near bright stars. These guiders are basically a 90° diagonal with an infrared (IR) mirror instead of the diagonal mirror. The main camera is mounted to see the visible light reflected in the “cold mirror,” while the guiding camera is mounted on the back of the diagonal and views the IR image for guiding. Since most silicon sensors do well in the IR, these work well for fields containing cooler stars. Note, however, that mounting a heavy CCD or CMOS camera at a 90° angle can cause issues with balance. Additionally, the equipment needed is still quite expensive at this point, but may become cheaper in the future.
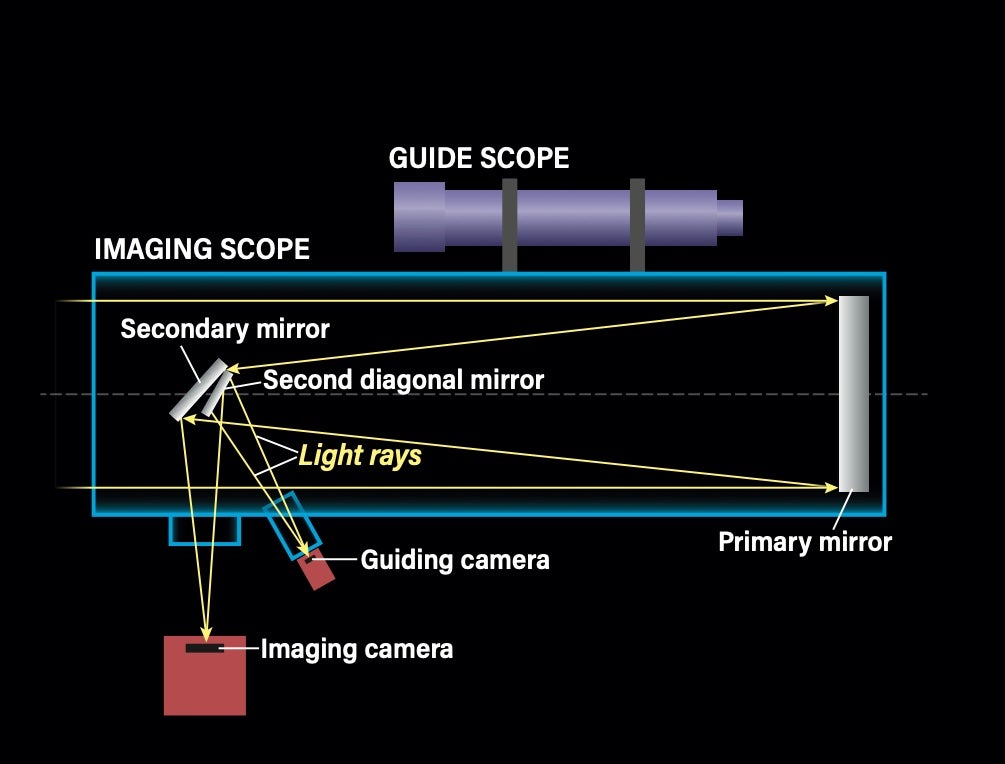
Second diagonal mirror. A few enterprising amateurs have found success by mounting a small, adjustable, square, flat mirror on the center of their main Newtonian diagonal mirror. The smaller mirror picks off a small annulus of light around the shadow of the secondary for guiding. This light is sent to a second focuser (where the guide scope is mounted) next to the primary focuser. While this method can work extremely well and will allow you to guide on either your subject or any sufficiently bright star in the field, it requires you to be skilled with tools and have the courage to modify your telescope.
Selecting the right guide camera
When selecting a suitable guiding camera, there are a few important parameters to consider. While in the past autoguiding cameras were CCDs, today’s cameras use CMOS technology. These sensors offer high sensitivity and low noise, with small pixel sizes and larger chip sizes for bigger fields.
Of key importance here is pixel size. Most imaging cameras used today for deep-sky targets have pixels ranging in size from 2.5 to 12 micrometers on multi-megapixel chips. Your guiding camera must be able to see equal to or better than the resolution on the imaging camera sensor. To ensure this is the case, calculate the image scale per pixel for both and compare. The formula for calculating arcseconds per pixel is: (Pixel size [μm]/Focal length [mm]) x 206.3.
Let’s look at an example. Say you have an 8-inch (200 mm) f/4 imaging Newtonian with an imaging camera with 6-μm pixels, and want to use a 3-inch (80 mm) f/6 guide scope with a guider camera with 3-μm pixels. Will this setup work?
The imaging camera has a scale of (6/800) x 206.3 = 1.5″/pixel. For the guiding camera, (3/480) x 206.3 = 1.3″/pixel. This is indeed close enough to ensure any movement on the imaging chip will be mirrored in the guiding chip. And you can add a 2–5x Barlow to achieve the correct effective focal length on the guide scope.
Guiding cameras must also have a guiding port. This usually is an RJ11 connector with six pins, called an ST4 port. This connects to your mount or hand controller with a standard RJ11 cable.
Guiding software
Many advanced cooled cameras for imaging deep-sky objects come with an autoguiding function in their control software. These can simultaneously run the guiding camera and the imaging camera, offering the convenience of using the same software option for everything.
There are also standalone programs for autoguiding, such as PHD2, Metaguide, and Guide Dog. I personally prefer PHD2. Not only does it support the widest variety of cameras and is simple to use, it also offers multistar guiding to average the movements of multiple guide stars. This eliminates improper corrections from poor seeing, which can cause the guide star to jump all over the field. I feel this feature allows PHD2 to outperform other guiding software in terms of accuracy and smooth tracking.
Analyzing your results
It’s best to immediately check your results to ensure you’re guiding correctly. When the first frame comes up on the computer screen at the end of the exposure, focus on the center of the image at 100-percent scale and examine the stars. If they are round and crisp, then congratulations on a fine job setting up your system!
If, however, the stars appear trailed in right ascension, this usually means either overaggressive tracking when trying to follow a star in poor seeing or flexure of the guide scope relative to the main instrument. Try a shorter exposure and see if anything changes. Poor guiding will make the stars trail the same amount even in shorter exposures. Conversely, if the issue gets progressively worse in longer exposures, then it is due to flexure.
Declination errors are usually remedied by changing the aggressiveness of the corrections to a lower value. Try an aggressiveness of 25 to 50 percent instead. Otherwise, too much backlash in declination gearing is usually the culprit. While some software allows for backlash compensation, it is best to eliminate the backlash, either by tightening the axis or shimming out the play in the telescope’s mount.
A winning shot
While non-astronomy family and friends usually look only for rich color, a nice composition, and plenty of colorful stars in your images, your astronomy friends and other deep-sky imagers will take a far more critical look at your results. The first thing they will see is the quality of the star images. No amount of good composition or splashy colors will be able to compensate for poorly imaged stars. So, it’s best to be patient and take the time to learn how to perfect your images. A well-guided image with sharp, round stars will go a long way toward producing a winning shot.