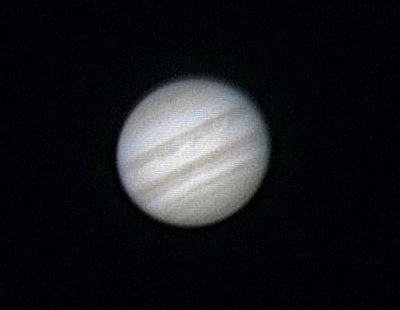
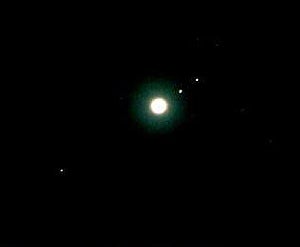
In addition to Jupiter’s moons, several dark stripes are easily seen on the planet. These stripes, above and below Jupiter’s equator, are known as the North and South Equatorial Belts. With larger telescopes operating at higher magnifications, more belts and bands are visible. See “Jupiter at its best” in the April 2004 issue of Astronomy for a full roundup of these features.
At higher magnifications, above about 150x, you can see that Jupiter is not a perfect sphere, a result of its rapid rotation rate coupled with the fact that it’s not a solid planet. Jupiter’s equatorial diameter is more than 5,500 miles (9,000 kilometers) larger than its polar diameter.
Watching Jupiter night after night, far from being monotonous, can be a rewarding pursuit. In addition to the changing aspects of the belts and zones on the planet’s face, Jupiter shows all its features in a single night. Jupiter spins once every 9 hours 55 minutes, so if you observe Jupiter early in the evening, the entire face you see will rotate and face away from Earth in half Jupiter’s rotation time, about 5 hours.
I’ve heard it said that Jupiter does not respond as well to high magnification as do Mars and Saturn. This may be due to the fact that Jupiter has too much detail and high magnification tends to “muddy the waters,” so to speak. In practice, this is more noticeable through telescopes with large central obstructions that provide bad contrast. Most of the time, the clarity of features on Jupiter is related to atmospheric conditions right here on Earth and not the amount of detail on Jupiter.
From my experience, beginning amateur astronomers are wary of filters. They don’t fully understand how filters should be used, they don’t know exactly what a filter should show, and the view through a color filter is very unappealing to them. This probably stems from a desire to appreciate the image from an aesthetic viewpoint. Well, color filters have their purposes, but I guarantee you that making an object “pretty” isn’t one of them. Their purpose is to exaggerate contrast, differences in brightness. In fact, nearly all criticisms of color filters indicate the observer was looking for changes in color rather than changes in brightness.
All Jupiter observers should use filters because they bring out fainter detail than what can be seen in unfiltered light. A blue (e.g., Wratten 38A) filter will enhance the dark, reddish-brown belts circling the planet. A red (e.g., Wratten 23A) filter will bring out the blue features within the Equatorial Zone of Jupiter as well as the northern and southern borders of the main belts. Blue filters also bring out the contrast within the bright zones and sharpen cloud features. Please be aware that the larger the telescope, the better the filters will work. It’s a simple matter of light throughput. If you have a small telescope, don’t use dense filters. For example, substitute an orange (Wratten 21) or even a yellow (Wratten 12) filter for a red (e.g., Wratten 25) one.
Draw quickly! As stated above, Jupiter rotates quite rapidly and some of the features you’re sketching may rotate out of view if you take longer than about 20 minutes. Sketch the positions of the equatorial belts and polar regions first. Carefully estimate their widths and extent and where, in terms of latitude, they begin and end. Next, draw the less apparent belts and zones as they appear, but work on one hemisphere at a time. Place features within the belts and zones using Jupiter’s central meridian (an imaginary line from top to bottom) to help you gauge the distances. Finally, carefully shade your sketch to duplicate what you see.
Jupiter is so bright that some observers use a dim white light aimed at their sketch pad. I can’t endorse this practice because it doesn’t work for me. When I have used a white light, too many of the subtle details on the planet have been lost.
One technique some observers say works well to bring out additional detail on Jupiter is to focus your eye on a spot halfway between one of the poles and the equator. But don’t look at the spot. Concentrate on seeing and sketching detail in the polar area. (This takes some practice.) Then repeat the process for the other hemisphere. If you’re looking for more realism in your sketches, try drawing the outline of Jupiter as a slight oval, as it appears to you through the telescope.
Telescopes with apertures of 10 inches and above plus good seeing conditions will show details on the Galilean satellites themselves. With high magnifications (350x and more), you will be able to resolve distinct satellite disks, especially during satellite transits. Transits are times when the moons of Jupiter pass in front of the planet. This reduces the glare of the satellite because Jupiter provides a lighter background than the black night sky. If you’re going to observe a satellite while it’s transiting the globe of Jupiter, be sure to find it before it starts its passage. Ganymede, the largest jovian moon, is the best candidate for seeing details. Look for a lighter shading in its polar regions, areas that are covered with frost. With large telescopes, you may even observe the colors of Jupiter’s large moons.

