I have been doing astrophotography for 35 years. I started with film, then moved to film plus computers, and now I’m doing pure digital with CCD cameras. I’ve used telescopes of every type and size: Newtonians, Cassegrains, Ritchey-Chrétiens, and refractors. And each one had its own quirks. Some were hard to collimate; some changed their collimation when pointed to different parts of the sky; some defocused at the mere suggestion of temperature change; and some were not truly apochromatic, meaning all three colors were not focused at the same point.
All of this changed three months ago when I took possession of a PlaneWave CDK17 with quartz optics. I have never owned a telescope that worked perfectly, right out of the box. But even after a 400-mile (644 kilometers) journey from Los Angeles to my home in Foresthill, California, with the scope bouncing in the back of my pickup, the collimation was still perfect. Furthermore, when I point this telescope anywhere in the sky and turn it upside down — still no change.
High-quality manufacturing
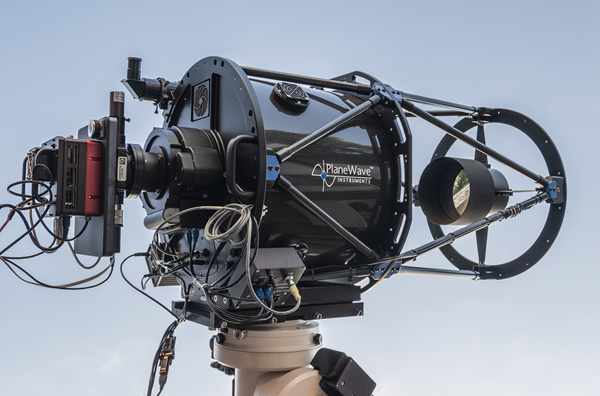
Looking at the construction of the telescope, you can see why. Even the secondary mirror holder is a massive affair kept in place by solid spider vanes and supported by carbon fiber Serrurier trusses.
The scope weighs more than 100 pounds (45 kg) with accessories and a camera, so a substantial mount is necessary. One of the new PlaneWave L-Series mounts would be ideal. It’s important to get a mount that will track at least two hours past the meridian to take advantage of the CDK17’s rigidity and optical integrity.
The CDK17 is cooled by seven fans, three in the back and four arranged around the periphery of the front of the mirror. My routine is to start cooling as soon as the Sun goes down and to stop the fans when I start to image. By then, the scope’s temperature usually is within 1 degree of ambient.
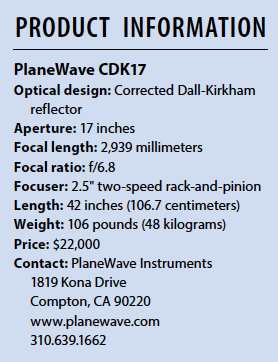
PlaneWave coats both mirrors with 96-percent-reflective enhanced aluminum. When combined with the scope’s f/6.8 focal ratio, that means you’ll capture a lot in a single 20-minute exposure.
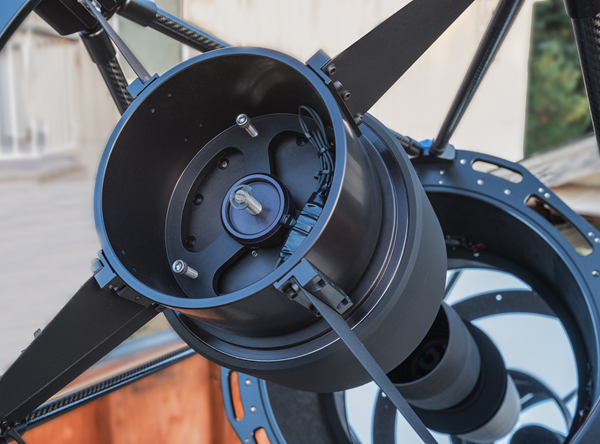
The optical design of the telescope bears explanation. CDK stands for corrected Dall-Kirkham — corrected because a Dall-Kirkham design by itself produces sharp images at the center of the field of view but has terrible aberrations away from that zone. PlaneWave’s design uses an ellipsoidal primary combined with a spherical secondary and a two-element corrector lens housed at the bottom of the primary baffle tube. The baffle tube is made using a 3D printing process, and the tube is optimized to give a 70-millimeter image circle at the camera end with pinpoint stars to the edges.
The most important element in this optical design is the spherical secondary mirror. All regular Cassegrain reflectors must have the secondary centered exactly in front of the primary. The slightest misalignment will destroy the acuity of the telescope. But with a spherical secondary, exact centering is not critical as long as the secondary is collimated to the primary — an easy task that only takes minutes when it is needed. As mentioned earlier, I have yet to collimate my CDK17.
The telescope is completely free of astigmatism, an issue that Dall-Kirkham telescopes have had in the past. PlaneWave’s solution was a redesign of the mounting that allows the primary mirror to essentially float in the air, independent of any thermal stress that a more rigid mounting would create. Stars show identical patterns on either side of focus, a testament to the excellence of the optics.
Perfect focus
PlaneWave has created an amazing automated focusing routine. The telescope comes with a type of V-curve software that takes five images, changing the focus with each one. When the exposures are finished, it analyzes all the stars in the images, not just a few. After calculating the best focus position, the telescope then moves the focuser to that position. The quartz optics will hold that focus for the entire imaging session.
Initially I didn’t trust automatic focusing. How could it be that easy? So, I would bracket manually around the calculated point to see if I could do better.
I couldn’t.
It nails the focus every time. This process works with MaxIm software, and you can set up various schedules to refocus if need be, but with the quartz optics, I have found there is no need.
Here’s how I use the telescope to acquire data: I first locate my target. Once my monitor displays it (via a link to my CCD camera), I fine-tune the cropping and rotation and take an exposure that will later serve as my cropping guide for future nights.
The telescope has been cooling for a while, but before I start imaging, I run the focus routine I described earlier. Depending on the object, I may take LRGB exposures or perhaps narrowband frames using scripting in MaxIm. If the Moon is partially up, I’ll shoot the narrowband first and follow it with the LRGB.
Not all nights are the same, so I will shoot every clear night and reject any nights of bad seeing (a measure of the air’s steadiness). I shoot darks and flats once I acquire all my data, and flats are easy to do with the CDK17 because the front of the telescope is flat. There’s no focus motor protruding, so it’s easy to hang a light panel on the front of the scope.
Final thoughts
The CDK17 has a history of constant improvements. This has been PlaneWave’s philosophy through the years. I’m still looking for something — anything — that might be wrong with this telescope. I haven’t found it yet. Is it a perfect telescope? It just might be.

