Key Takeaways:
With more of us living in cities and urban environments, the problem of light pollution is all too familiar. Even those lucky enough to live outside large metropolises don’t escape untouched, because the sky near the horizon is often lost to sky glow. This leaves astroimagers with a choice to make: Invest in a fixed setup with narrowband or light pollution filters, or make the best of a lightweight, portable setup and head to dark-sky sites.
In my case, the choice was made for me. I live in the center of a city, so a permanent setup was neither a viable nor secure option.
But how far can one go in this hobby with a kit light enough to be transported and built on location, without assembly consuming the entire evening? After all, everything beginning imagers hear or read promotes the idea that aperture is king and that the longer the exposure time, the better your results. And it’s well known that a solid mount is a minimum requirement.
I didn’t think that any of those principles were compatible with portability. But eventually, I realized that with the technology now available, you can go far in this hobby with just a little extra work and commitment.
Equipment considerations
I first became obsessed with choosing the correct mount. It was difficult to find strong equipment that was also lightweight. But because the mount is critical, I needed to get this right. After a considerable amount of research, I settled on a center-balanced equatorial mount (CEM). The deciding factor was its promise of a high weight capacity from a mount that itself weighed significantly less than a standard German equatorial mount.
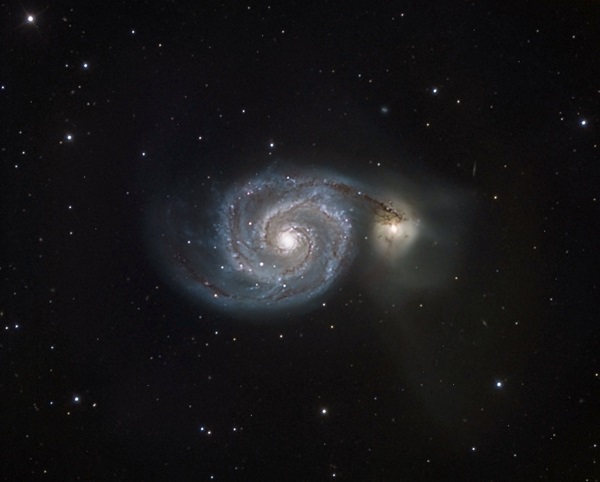
Over the years, I’ve experimented with numerous setups, looking for the perfect one. After a few years of imaging large nebulae with a 3.2-inch refractor, I purchased a 10-inch Ritchey-Chrétien (RC) reflector to use as a portable imaging setup to shoot galaxies. It weighed in at 55 pounds (25 kilograms), but my mount easily handled the weight. (I, on the other hand, just barely managed the hefty telescope.)
I had other issues as well. The first was collimation; the process of transporting the scope ensured its optics needed realigning prior to each setup. Also, a cool-down time in excess of two hours was required. Suddenly, half my night was spent setting up or just waiting around. I learned an expensive lesson: An RC is not a portable imaging scope.
Until recently, I had been using a monochrome CCD camera, filter wheel, electronic focuser, and guide camera on my 3.2-inch refractor. The entire system has a combined weight just over 13 pounds (6 kg). This gave me the portability I needed, while allowing me to capture the long, guided exposures I wanted. I have had great success with this setup and can be up and running within 45 minutes of arriving onsite. The only drawback is that it requires access to AC power. Having access to a roll-off shed at a local observatory has allowed this setup to work well, but on nights when that site wasn’t an option, it’s quite a limiting factor.

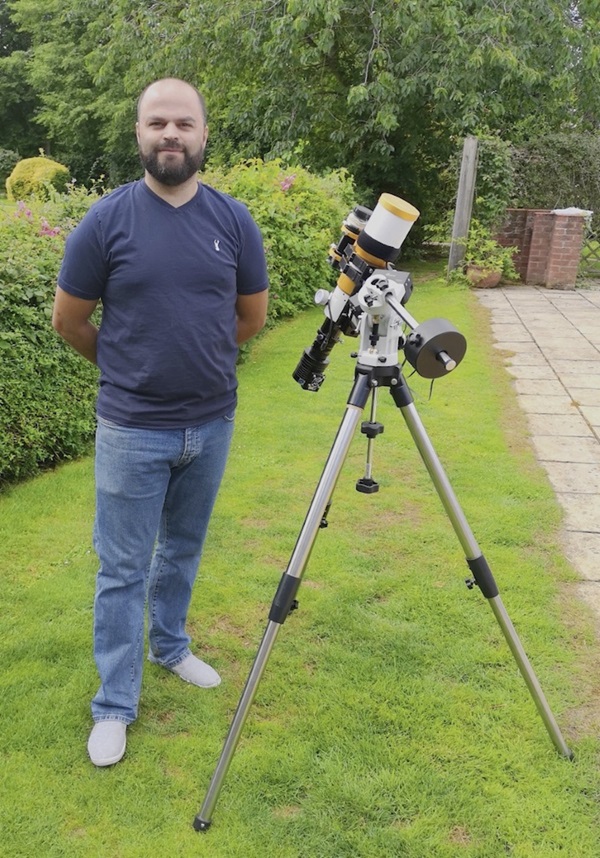
After all my trials, I have settled on an excellent system. Over the last few years, mount technology has come a long way and lightweight “star trackers” have come into their own. These were originally designed to carry a DSLR for wide-field Milky Way photography; however, some can now carry as much as 11 pounds (5 kg). This increased payload, while impressive for a small mount, still falls short for my refractor setup.
To address this, I needed to strip it down and return to basics. The purchase of an adapter allows camera lenses to be connected to a CCD, and removal of the guider led to an extremely light setup that didn’t require AC power. Instead, everything runs from a 12-volt battery connected to a multi-USB adapter.
Exposure times
Posts in forums, magazine articles, and comments on social media made it clear to me that better images result from combining longer individual exposures. I wondered how much difference this makes in the real world. Also, what constitutes a “long exposure” for modern cameras?
I know from experience with my own camera that three hours of total exposure time is the minimum required for a high-quality result. But I wondered: Does the individual exposure length affect the outcome? For years, I had used 15-minute exposures as my staple, but when I removed the autoguider that I had on previous systems, these were no longer feasible. After a little experimentation, I settled on 60-second exposures. This has proven to be a nice length because I haven’t lost many frames due to drive errors.
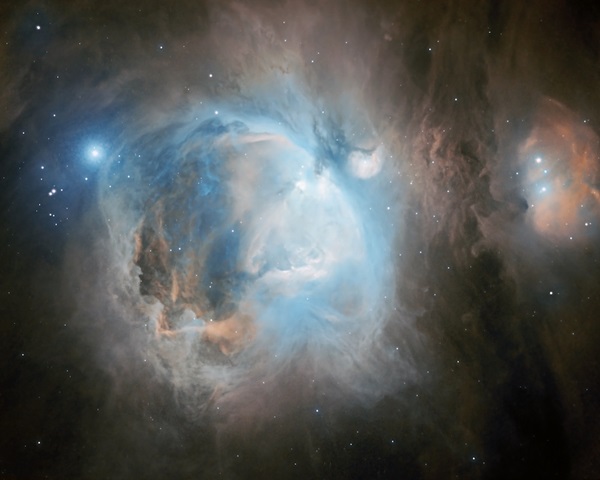
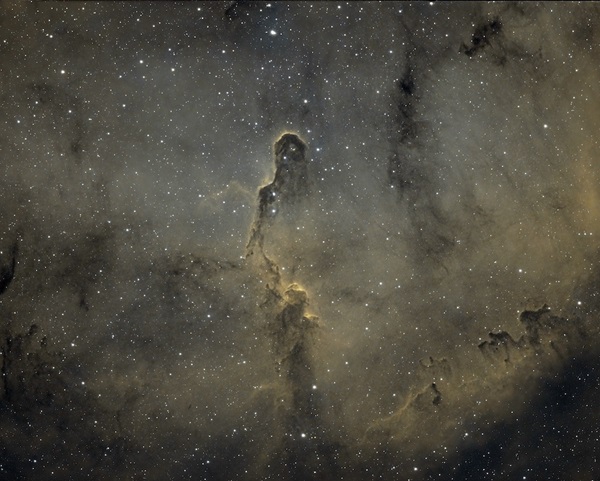
To say I was pleasantly surprised with the results is an understatement. The shorter exposure length did not impact image quality. All the faint details I was used to seeing were still present once I stacked the images. And the noise levels in the one-minute exposures were also on par with the stacked 15-minute photos I was used to working with.
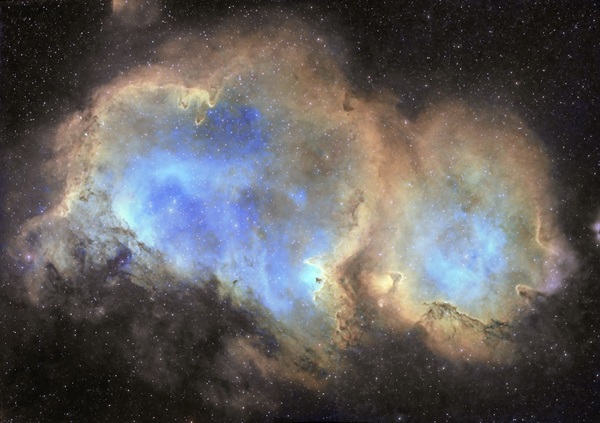
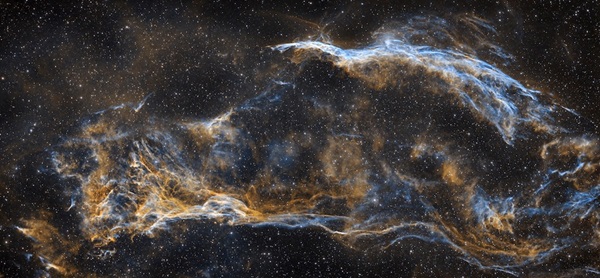
The one downside to using camera lenses instead of my small refractor is that the lenses’ shorter focal lengths result in slightly reduced image sharpness. However, the shorter focal length options have opened a whole new catalog of large targets that I could not image previously.

Success
Experimenting with a portable setup has shown me that no matter where you live, there are always options that don’t require you to sacrifice image quality. I now have a full astroimaging setup that fits in a backpack. So even if my mode of transport is a motorbike, I can head to a remote site with full confidence.
The lightweight setup combined with taking shorter exposures suits newer DSLRs and works brilliantly with older CCD sensors and their larger pixels. And the flexibility afforded by the ability to switch between camera lenses opens the sky in a whole new way. Ultimately, this lightweight, portable setup has reenergized me and reawakened my love of the hobby. Here’s hoping it will do the same for you.